Last Updated on 4th December 2020 by Suffocation
VS Code mit einigen Erweiterung hat in vielen Bereichen, die doch sehr einfach gestrickte Arduino GUI verdrängt. Gerade wenn es um größere Projekte oder um andere Programmiersprachen wie MicroPython geht, kommt man an VS Code fast nicht mehr vorbei.
In diesem Artikel umreisse ich kurz die portable Installation, wie ich sie für mich gemacht habe. Für neue Zwecke/Programmiersprachen kopiere ich sie mir und füge die benötigten Plugins hinzu.
VS Code hat viele Plugins für diverse Programmiersprachen. Nicht immer arbeiten alle Hand in Hand. Deshalb habe ich mich für eine portable Installation entschieden. Dies ermöglicht mir mehrere Installationen auf einem Rechner zu haben. Hierbei hat jede Version ihre eigenen, für sich wichtigen Plugins.
Ein Nachteil an dieser Installationsart ist, dass VS Code manuell aktualisiert werden muss. (Neue Version Ziehen, alte überbügeln neu Konfigurieren). Plugins wie git müssen evtl. mehrfach installiert werden und es wird mehr Festplattenspeicher benötigt.
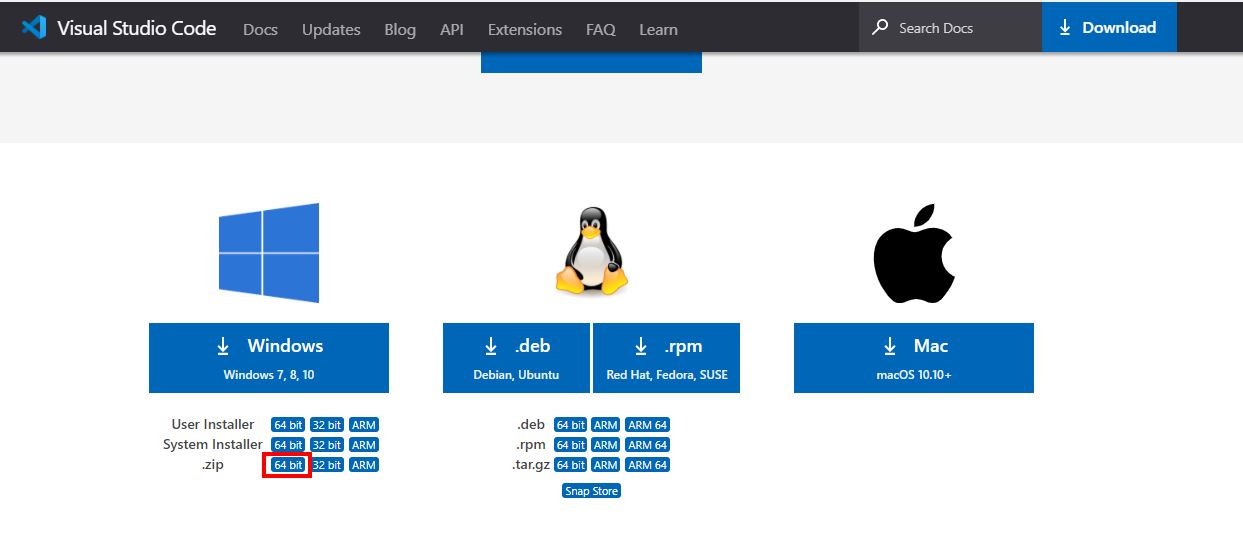
MicroPython Java C++ IoT Development Espressif Framework (IDF) and much more Junfräulich installiert VS Code Version VS Code can be downloaded for free from the following link. I use the ZIP version.
https://code.visualstudio.com/#alt-downloads
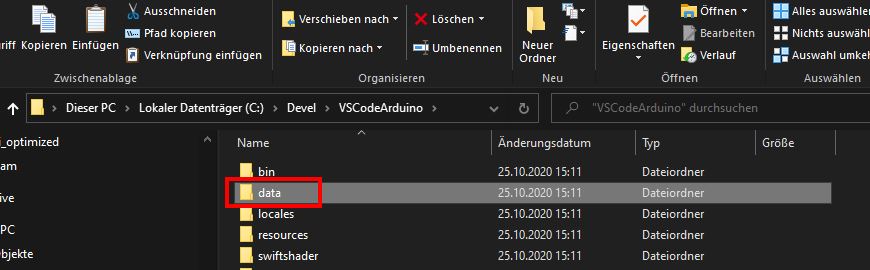
VS Code – Alternative Download Page Die Datei nach dem Herunterladen entpacken und einen Unterordner „data“ anlegen. Im dem Ordner legt VSC alle Einstellungen und Plugins ab. Das Hauptverzeichnis noch an einen Ort mit möglichst kurzem Pfad ohne Lehrzeichen kopieren. Das war es auch schon.
VSCode Folder – with data subfolder Update muss Manuell durchgeführt werden.
VS Code ist schnell installiert. Ohne Plugins allerdings blank wie ein Babypopo. Wie es für euch nutzbar ist könnt ihr in den verlinkten Beiträgen entnehmen. Wenn ihr Fragen oder Anmerkungen habt lasst einen Kommentar da.
VS Code Alternative Download Page
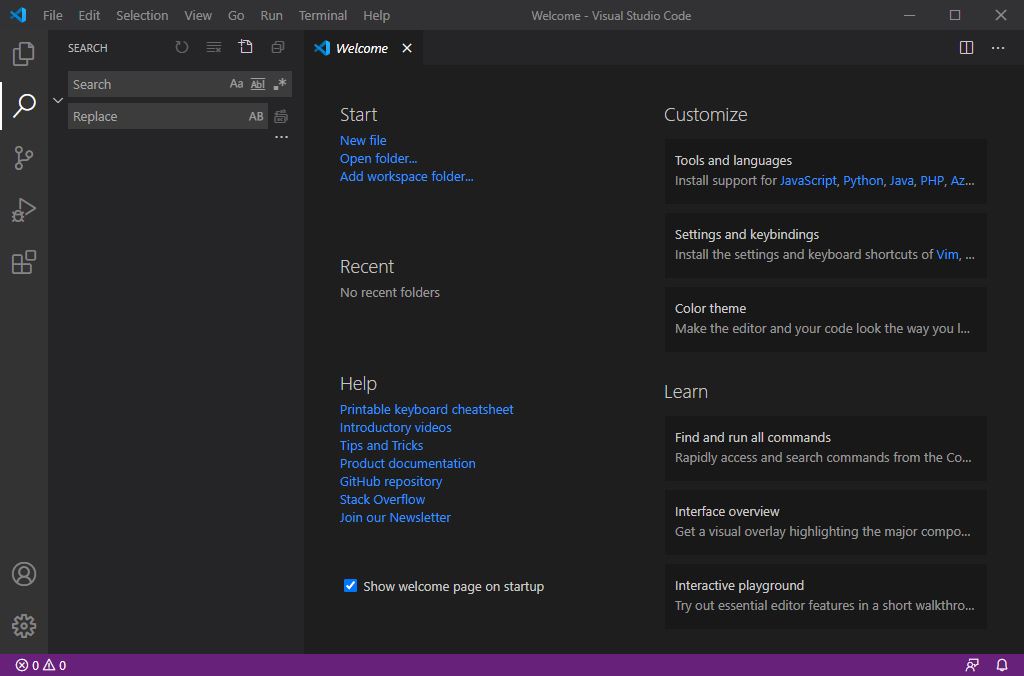
VS Code Start page
Here's how to use multiple installations of VSCode:
**1. Install VSCode Multiple Times (Simple but not recommended)**
This is the most straightforward method, but it can lead to issues with extensions and settings becoming mixed up or not working as expected.
* **Download different versions:** Go to the VSCode download page and download different versions (e.g., latest stable, older version, Insiders build).
* **Install each version in a separate directory:** During the installation process, make sure to choose a **different installation folder** for each version. For example, one in `C:\Program Files\VSCode Stable` and another in `C:\Program Files\VSCode Insiders`.
* **Launch the desired version:** You'll have separate shortcuts for each installation.
**Issues with this method:**
* **Extension conflicts:** Extensions installed in one version might not work or might interfere with extensions in another.
* **Settings duplication:** You'll have to configure settings and keybindings separately for each installation.
* **Workspace confusion:** Opening a file from one installation might still default to another if not handled carefully.
**2. Using VSCode Portable Versions**
VSCode offers "portable" versions which are self-contained and don't interfere with a standard installation. This is a much cleaner way to have multiple environments.
* **Download the portable version:**
* Go to the VSCode download page.
* Look for the "User Installer" or "System Installer" options. **Crucially, also look for "Zip" (Windows) or "Tar.gz" (Linux/macOS) options.** These are often the portable versions. For example, on Windows, you'll download a `.zip` file.
* **Extract to separate folders:** Extract each downloaded archive to a unique folder. For instance:
* `D:\VSCode-Portable-ProjectA\`
* `D:\VSCode-Portable-ProjectB\`
* **Launch from its folder:** To launch a specific portable instance, navigate into its folder and run the `Code.exe` (or equivalent) executable.
* **Specify the portable context:** You can also launch them from the command line with the `--user-data-dir` and `--extensions-dir` flags to ensure they use separate settings and extension directories. This is highly recommended for full isolation.
```bash
# Example for Windows
"D:\VSCode-Portable-ProjectA\Code.exe" --user-data-dir "D:\VSCode-Portable-ProjectA\data\user-data" --extensions-dir "D:\VSCode-Portable-ProjectA\data\extensions"
```
**Benefits of portable versions:**
* **Complete separation:** Each portable installation has its own settings and extensions, preventing conflicts.
* **No registry changes:** They don't modify your system's registry.
* **Easy to manage:** You can carry them on a USB drive or have them in dedicated project folders.
**3. Using Multiple User Data and Extension Directories (Advanced)**
This method allows you to run multiple instances of the *same* VSCode installation, but direct them to use different configuration and extension folders. This is particularly useful for testing different extension configurations or maintaining separate work environments without installing VSCode multiple times.
* **Install VSCode normally:** Have one standard installation of VSCode.
* **Create separate data directories:** Create distinct folders for each environment you want:
* `C:\Users\YourUser\AppData\Roaming\VSCode-Work\User\`
* `C:\Users\YourUser\AppData\Roaming\VSCode-Personal\`
* You'll also need corresponding `extensions` directories. A common practice is to create a `data` subfolder within your workspace:
* `C:\VSCode-Environments\Work\data\user-data`
* `C:\VSCode-Environments\Work\data\extensions`
* `C:\VSCode-Environments\Personal\data\user-data`
* `C:\VSCode-Environments\Personal\data\extensions`
* **Launch with flags:** Use the `--user-data-dir` and `--extensions-dir` command-line arguments when launching VSCode.
* **From Command Prompt/PowerShell:**
```bash
# Example for a "Work" environment
code --user-data-dir "C:\VSCode-Environments\Work\data\user-data" --extensions-dir "C:\VSCode-Environments\Work\data\extensions"
# Example for a "Personal" environment
code --user-data-dir "C:\VSCode-Environments\Personal\data\user-data" --extensions-dir "C:\VSCode-Environments\Personal\data\extensions"
```
*(Note: `code` is the command if you've added VSCode to your PATH during installation. If not, use the full path to `Code.exe`.)*
* **Creating Desktop Shortcuts:** You can create custom desktop shortcuts:
1. Right-click on your desktop -> New -> Shortcut.
2. In the "Type the location of the item" field, enter the command:
`"C:\Users\YourUser\AppData\Local\Programs\Microsoft VS Code\Code.exe" --user-data-dir "C:\VSCode-Environments\Work\data\user-data" --extensions-dir "C:\VSCode-Environments\Work\data\extensions"`
*(Adjust the path to `Code.exe` and your data directories as needed.)*
3. Name the shortcut (e.g., "VSCode - Work"). Repeat for other environments.
**Benefits of this method:**
* **Leverages one installation:** Saves disk space and ensures you're always on the latest features of your installed VSCode.
* **Full isolation:** Each instance runs with its own extensions, settings, and themes.
* **Great for testing:** Ideal for trying out new extensions or configurations without affecting your primary setup.
**Which method to choose?**
* **For absolute beginners or occasional needs:** Portable versions (Method 2) are the easiest and most robust.
* **For power users wanting to manage multiple distinct environments from a single VSCode installation:** Using command-line flags with separate `--user-data-dir` and `--extensions-dir` (Method 3) is the most flexible.
* **Avoid Method 1** unless you have a very specific, limited need and understand the potential pitfalls.
Date Change Author 25.10.2020 Post created Suffocation