Last Updated on 25 September 2023 by Suffocation
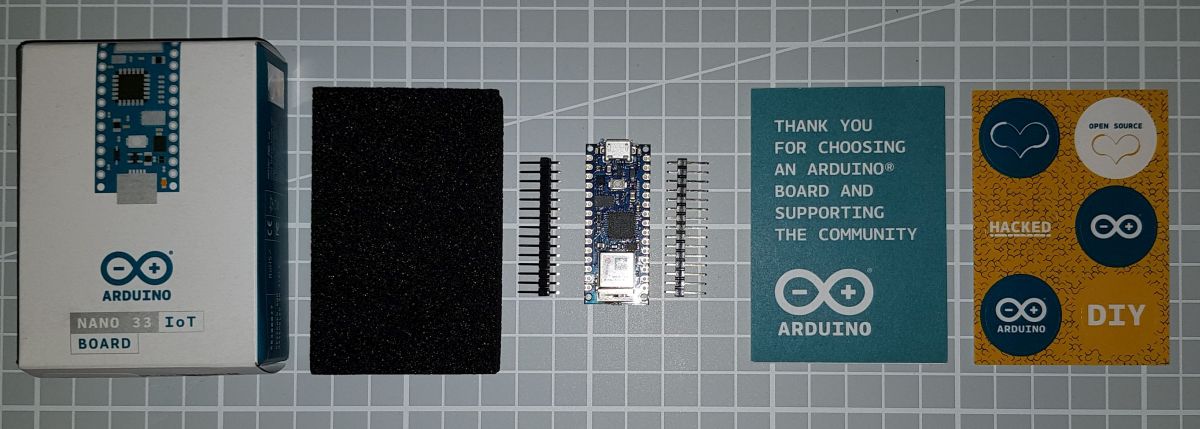
I couldn't resist in a shopping spree and ordered the new power package from Arduino. The 33 IOT is in the Nano form factor, but has WiFi. It also comes with a IMU integrated with the Acceleration and the situation in the room determined. More about this amazing board in the following sections.
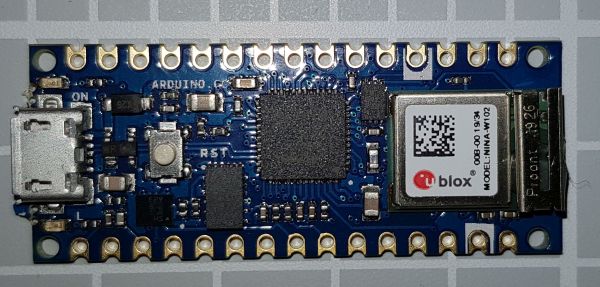
Die Wlan Kommunikation übernimmt ein ublock Baustein der intern einen ESP32 verbaut hat.
ATTENTIONThis Nano is not compatible with the original Nano as it operates at 3.3V instead of 5V. This is also indicated by the 33 in the name.
Facts
| Name | Arduino Nano 33 IoT | Arduino Nano 33 BLE |
|---|---|---|
| Number/CPU | 2 / SAMD21 Cortex®-M0+ 32-bit low-power ARM MCU | 1 / 64 MHz Arm® Cortex-M4F (with FPU) |
| Clock speed (MHz) | 48 | 64 |
| Kernel | ?/? | 1 |
| Digital IOs / Pins | 14 | 14 |
| Analog inputs | 8 | 8 |
| Interrupt Pins | 11 | 14 |
| Pulse Width Modulation | 8 | 14 |
| SPI | 1 | 1 |
| Flash memory | 256 | 1 megabyte |
| RAM (KB) | 32 | 256KB |
| EEPROM (KB) | – | – |
| WiFi | 2.4 GHz 802.11b/g/n NINA-W102 |
– |
| Encryption | WEB / WPA2 / TKIP / AES? | – |
| Bluetooth | 4.2 BR/EDR / 4.2 Low power | NINA-B306 Module Bluetooth® Low Energy 5.0 Module Bluetooth® 5 Multiprotocol / Zigbee |
| UART | 1 | 1 |
| I2C | 1 | 1 |
| Ethernet | – | – |
| Video | – | – |
| Sound | – | – |
| Miscellaneous | – | LSM9DS1 (9-axis IMU) MPM3610 DC regulator NFC-A tag Nina B306 |
| USB | 1 Micro | |
| Operating voltage [V] | 3,3 | 3,3 |
| Input voltage | 21 | 21 |
| Current (mA) / Standby (mA) | 7 / | 30 |
| Size L x W x H | 18x45x4 | 43,16 x 17,7 |
| Weight [g] | 7 | 5 |
Areas of application
- Bluetooth-controlled applications
- Connected sensors
- Internet of Things
Views
Programming
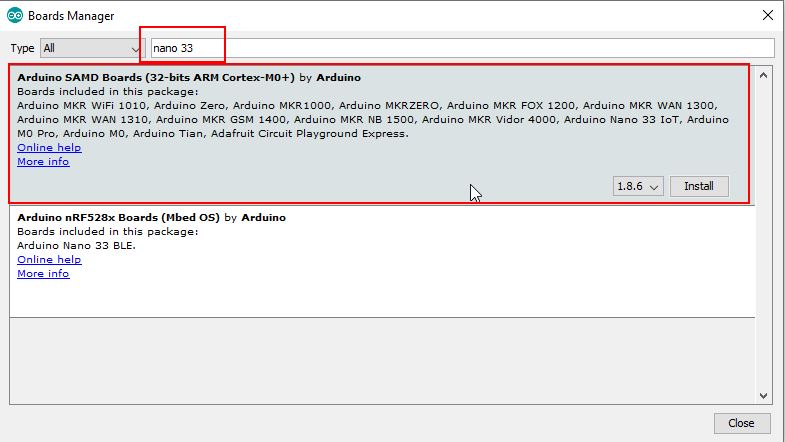
Install Board
Das der Nano33Iot selbst muss über den Board Manager installiert werden.
Libraries
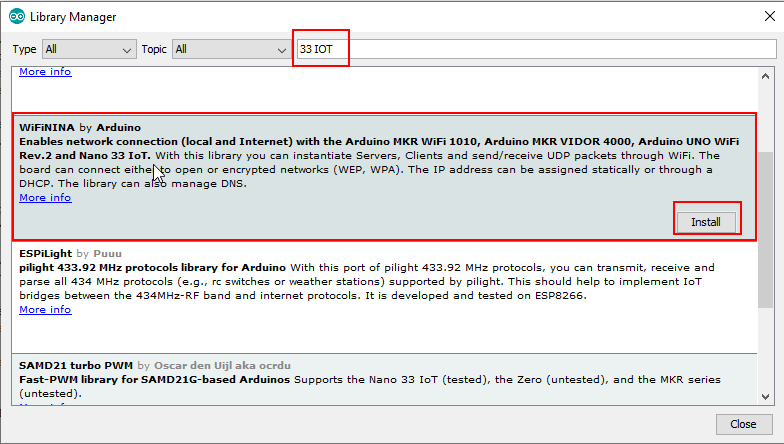
Wi-Fi
Für das WLan gibt es die WiFiNINA Library.
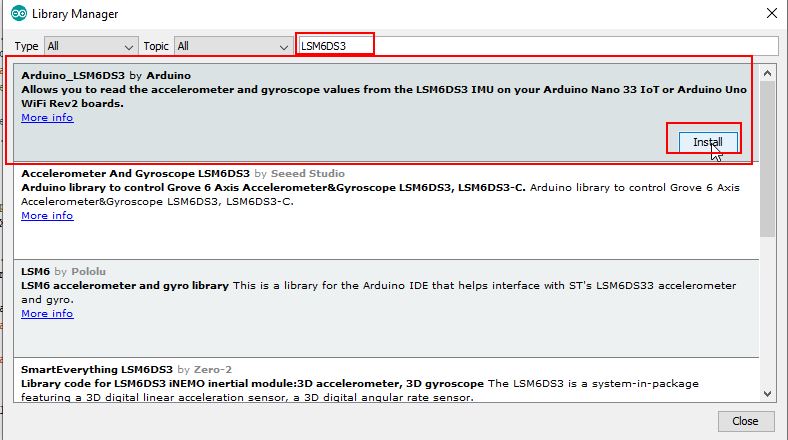
IMU
The IMU Ship is a LSM6DS3 und Arduino bietet hierfür eine eigenen Biliothek. Die Installation ist über den Bibliothekar möglich.
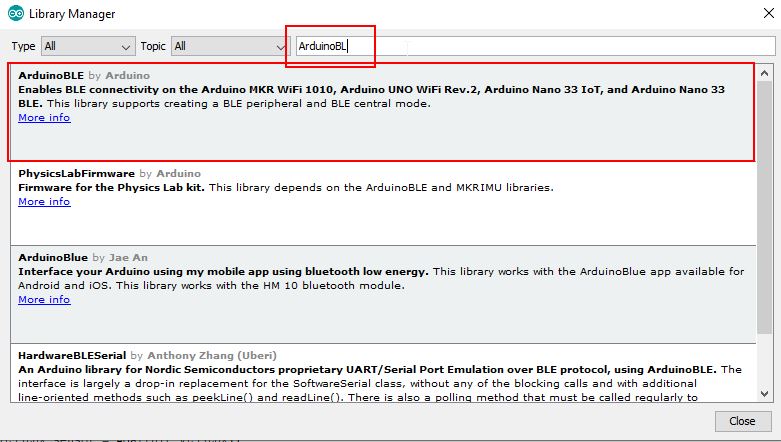
Bluetooth
Für Bluetooth hat Arduino eine eigene Bibliothek die alle ihre Chips unterstützen.
Test programme
Bluetooth
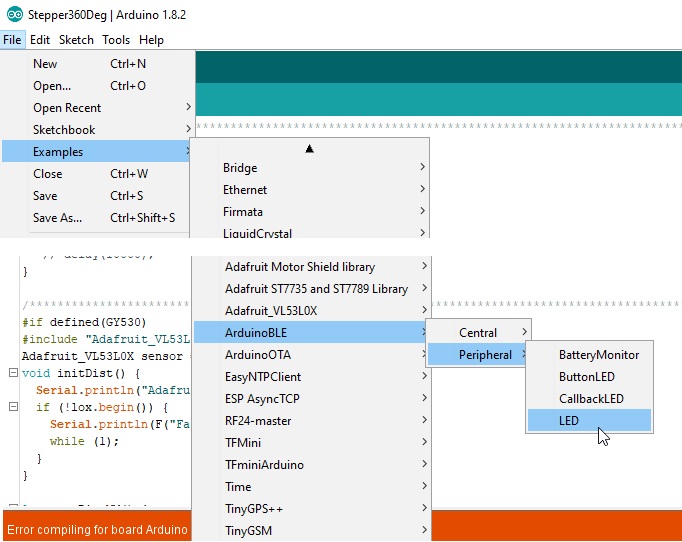
The ArduinoBLE library includes a simple test program. This can be used to switch the LED on and off on the Nano board via Bluetooth.
Testprogramm auswählen, compilieren und auf den Arduino spielen.
Android App fürs Handy installieren um werte and das Bluetooth device zu schicken.
Nagut auch für Apfelnutzer:
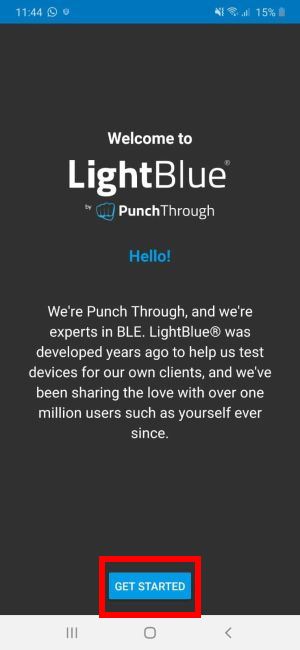
Launch Application
Select device
Unten eine 0 = für LED aus bzw. alles andere für LED an eintragen und den Write Knopf drücken.
Miscellaneous
Programmieren über das Netzwerk
https://github.com/jandrassy/ArduinoOTA
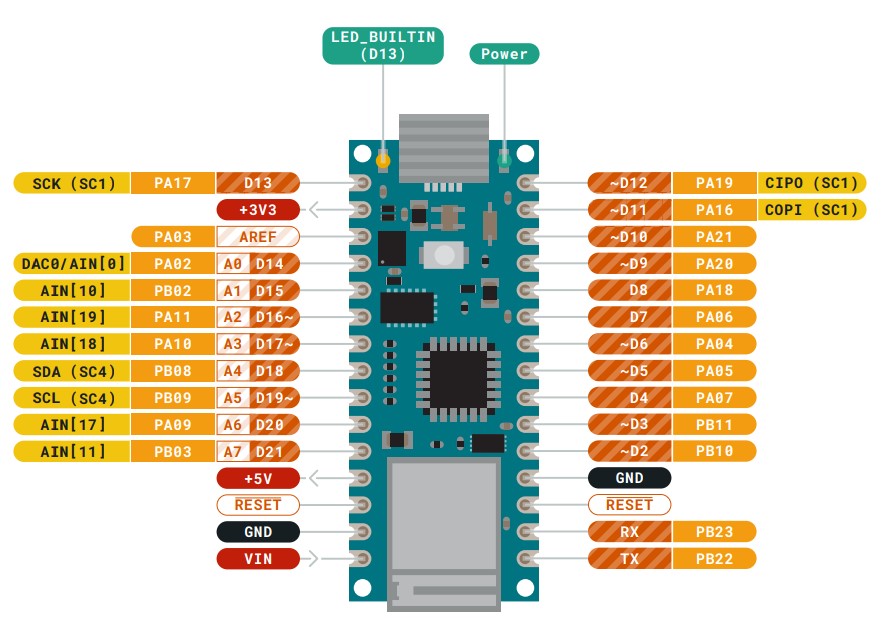
Vollständiges Pinout bei Arduino
https://content.arduino.cc/assets/Pinout-NANO33IoT_latest.pdf
Fritzing part
https://content.arduino.cc/assets/Arduino%20Nano%2033%20IOT.fzpz
5 Volt supply to activate
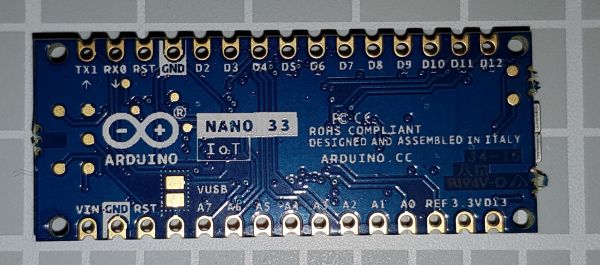
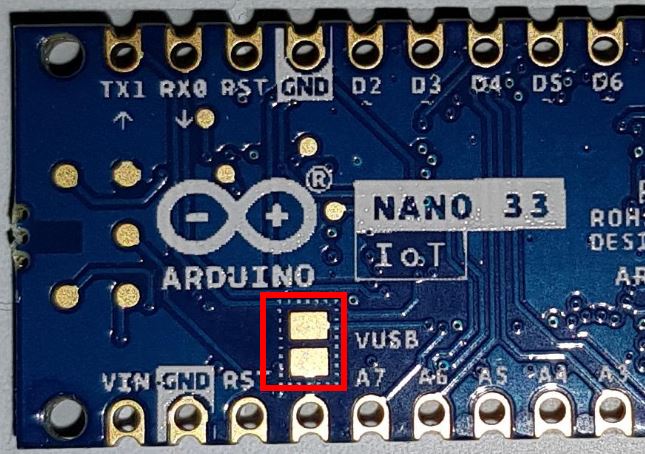
Am 5 Volt Pin kann die 5V USB Spannung angezapft werden. Dies ist gut für Sensoren die eine 5V Versorgungsspannung brauchen. Aber bitte aufpassen, 5V an den Eingängen kann den Nano beschädigen.
Der 5V Pin ist bei Auslieferung nicht angeschlossen. Hierfür sind zwei Kontaktfelder auf der Unterseite, die mittels Lötzinn verbunden werden müssen. Siehe hierzu auch die folgende Abbildung.
Problems
No BLE connection on the phone
I suspect my Samsung Galaxy S8 is too old, I can see the Arduino in the Bluetooth monitor, but I can't use it in Light Blue.
Conclusion
Mit dem 33 IOT haben die Arduino Entwickler gezeigt, dass sie verstanden haben mit Wifi in der IOT Welt weiter zu kommen. Das Board lässt fast keine Wünsche übrige. So wäre ein Kompassmodul zur Komplettierung der IMU ganz nett, ist aber auch von aussen anschliessbar. Der Arduino bietet viele Anschlüsse Analog und Digital, Interrupts für gezielte Rückmeldungen wie Odometrien sind genügen vorhanden. Alles was man für den Roboterbau braucht. Die Wifi Verbindung scheint stabil zu sein, auch die Beispielprogramme funktionieren ohne Probleme.
Ein kleiner Wehmutsdropfen bleibt der hohe Preis von 25€-35€. Wer nicht so viele Ports braucht ist hier mit dem ESP8266 or its successor ESP32 günstiger unterwegst und bekommt unter 10€ noch ein Display dazu. Die IMU muss jedoch extern betrieben werden.
Der USB Port ist etwas gewöhnungsbedürftig, nach dem Programmieren wird ein Reset durchgeführt, das erinnert an den Leonardo.
Verwandte Beiträge
Sources
Arduino Bluetooth Contribution
https://github.com/jandrassy/ArduinoOTA
https://www.arduino.cc/en/Reference/WiFiNINA
https://www.arduino.cc/en/Guide/NANO33IoT
https://content.arduino.cc/assets/Arduino%20Nano%2033%20IOT.fzpz
https://content.arduino.cc/assets/Pinout-NANO33IoT_latest.pdf
| Date | Change | Author |
|---|---|---|
| 29.04.2020 | Post created | Suffocation |