Last Updated on 8. October 2026 by SuffocationLink status: OK
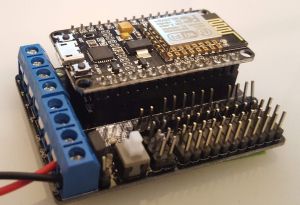
Für den NodeMCU V2 gibt es eine Erweiterungsplatine mit Motortreiber. Mit ihr können zwei kleine Motoren (bis 1,2 Ampere) über eine Motorbrücke L293DD angesteuert werden. Auch der Anschluss eines Schrittmotors ist möglich.
Sie bietet weiterhin zwei getrennte Anschlüsse für die Stromversorgung der Platine und die der Motoren. Die meisten Pins des ESP sind mit einem zusätzlichen Masse/Strom Pin herausgeführt, was den Anschluss von Peripherie erleichtert.
Die Pins D1, D2, D3 und D4 sind von der Motorbrücke belegt.
Data
Power Supply: 4.5V to 9V
Motorspannung: 4,5V – 36V
Maximum motor current: 1.2 A
View
Front view

Rear view

Connections

Pin assignment
Mit den Pins D1 -D4 können die Motoren angesteuert werden, weitere Belegungen können der Tabelle unten entnommen werden.

Programming
Der Versuchsaufbau gestaltet sich simpel. Den ESP8266 aufs Board stecken, zwei Motoren an die entsprechenden Kontakte anschließen und das Beispielprogramm unten auf den ESP laden.
Library
… habe nach kurzer Suche keine gefunden, für jeden Tipp bin ich dankbar.
Own test program
Hier ein simpler Test. Er lässt beide Motoren vorwärts drehen, rückwärts drehen und stoppen.
ESP8266MCUV2MotorplatineLink status: OK
Own lib
I'll probably write a class in the near future that encapsulates all the functions.
Related Posts
Sources
| Date | Change | Author |
|---|---|---|
| 08.10.2026 | Überschriften-Hierarchie korrigiert (H1→H2, Unterebenen eine Stufe tiefer) | Suffocation |
| 04.10.2026 | Rechtschreibung korrigiert: Tippfehler, Kommas, Grammatik | Suffocation |
| 03.10.2026 | Log-Liste eingefügt | Suffocation |
| 25.06.2018 | Post created | Suffocation |
Hello Stefan Krebber,
One could wire this up via an analogue port (exactly one on the ESP8266) and a voltage divider, and then read out and convert the analogue port in Tasmota. For exact instructions, I would need to read up on it myself first. But it must also be said that the board is very old and has its weaknesses. There are certainly some more modern variants, for example for the D1 Mini or Arduino Wi-Fi with a motor shield. Also, motors can be operated on almost any microcontroller using a motor driver board. This is usually more flexible and also allows stronger motors to be operated. Regards, Stefan
Good day
I've only just discovered this circuit board for myself and find it very exciting. .
Is there a way to read the battery level under Tasmota? Or do you have any experience in this area?