Last Updated on 27. September 2025 by Suffocation
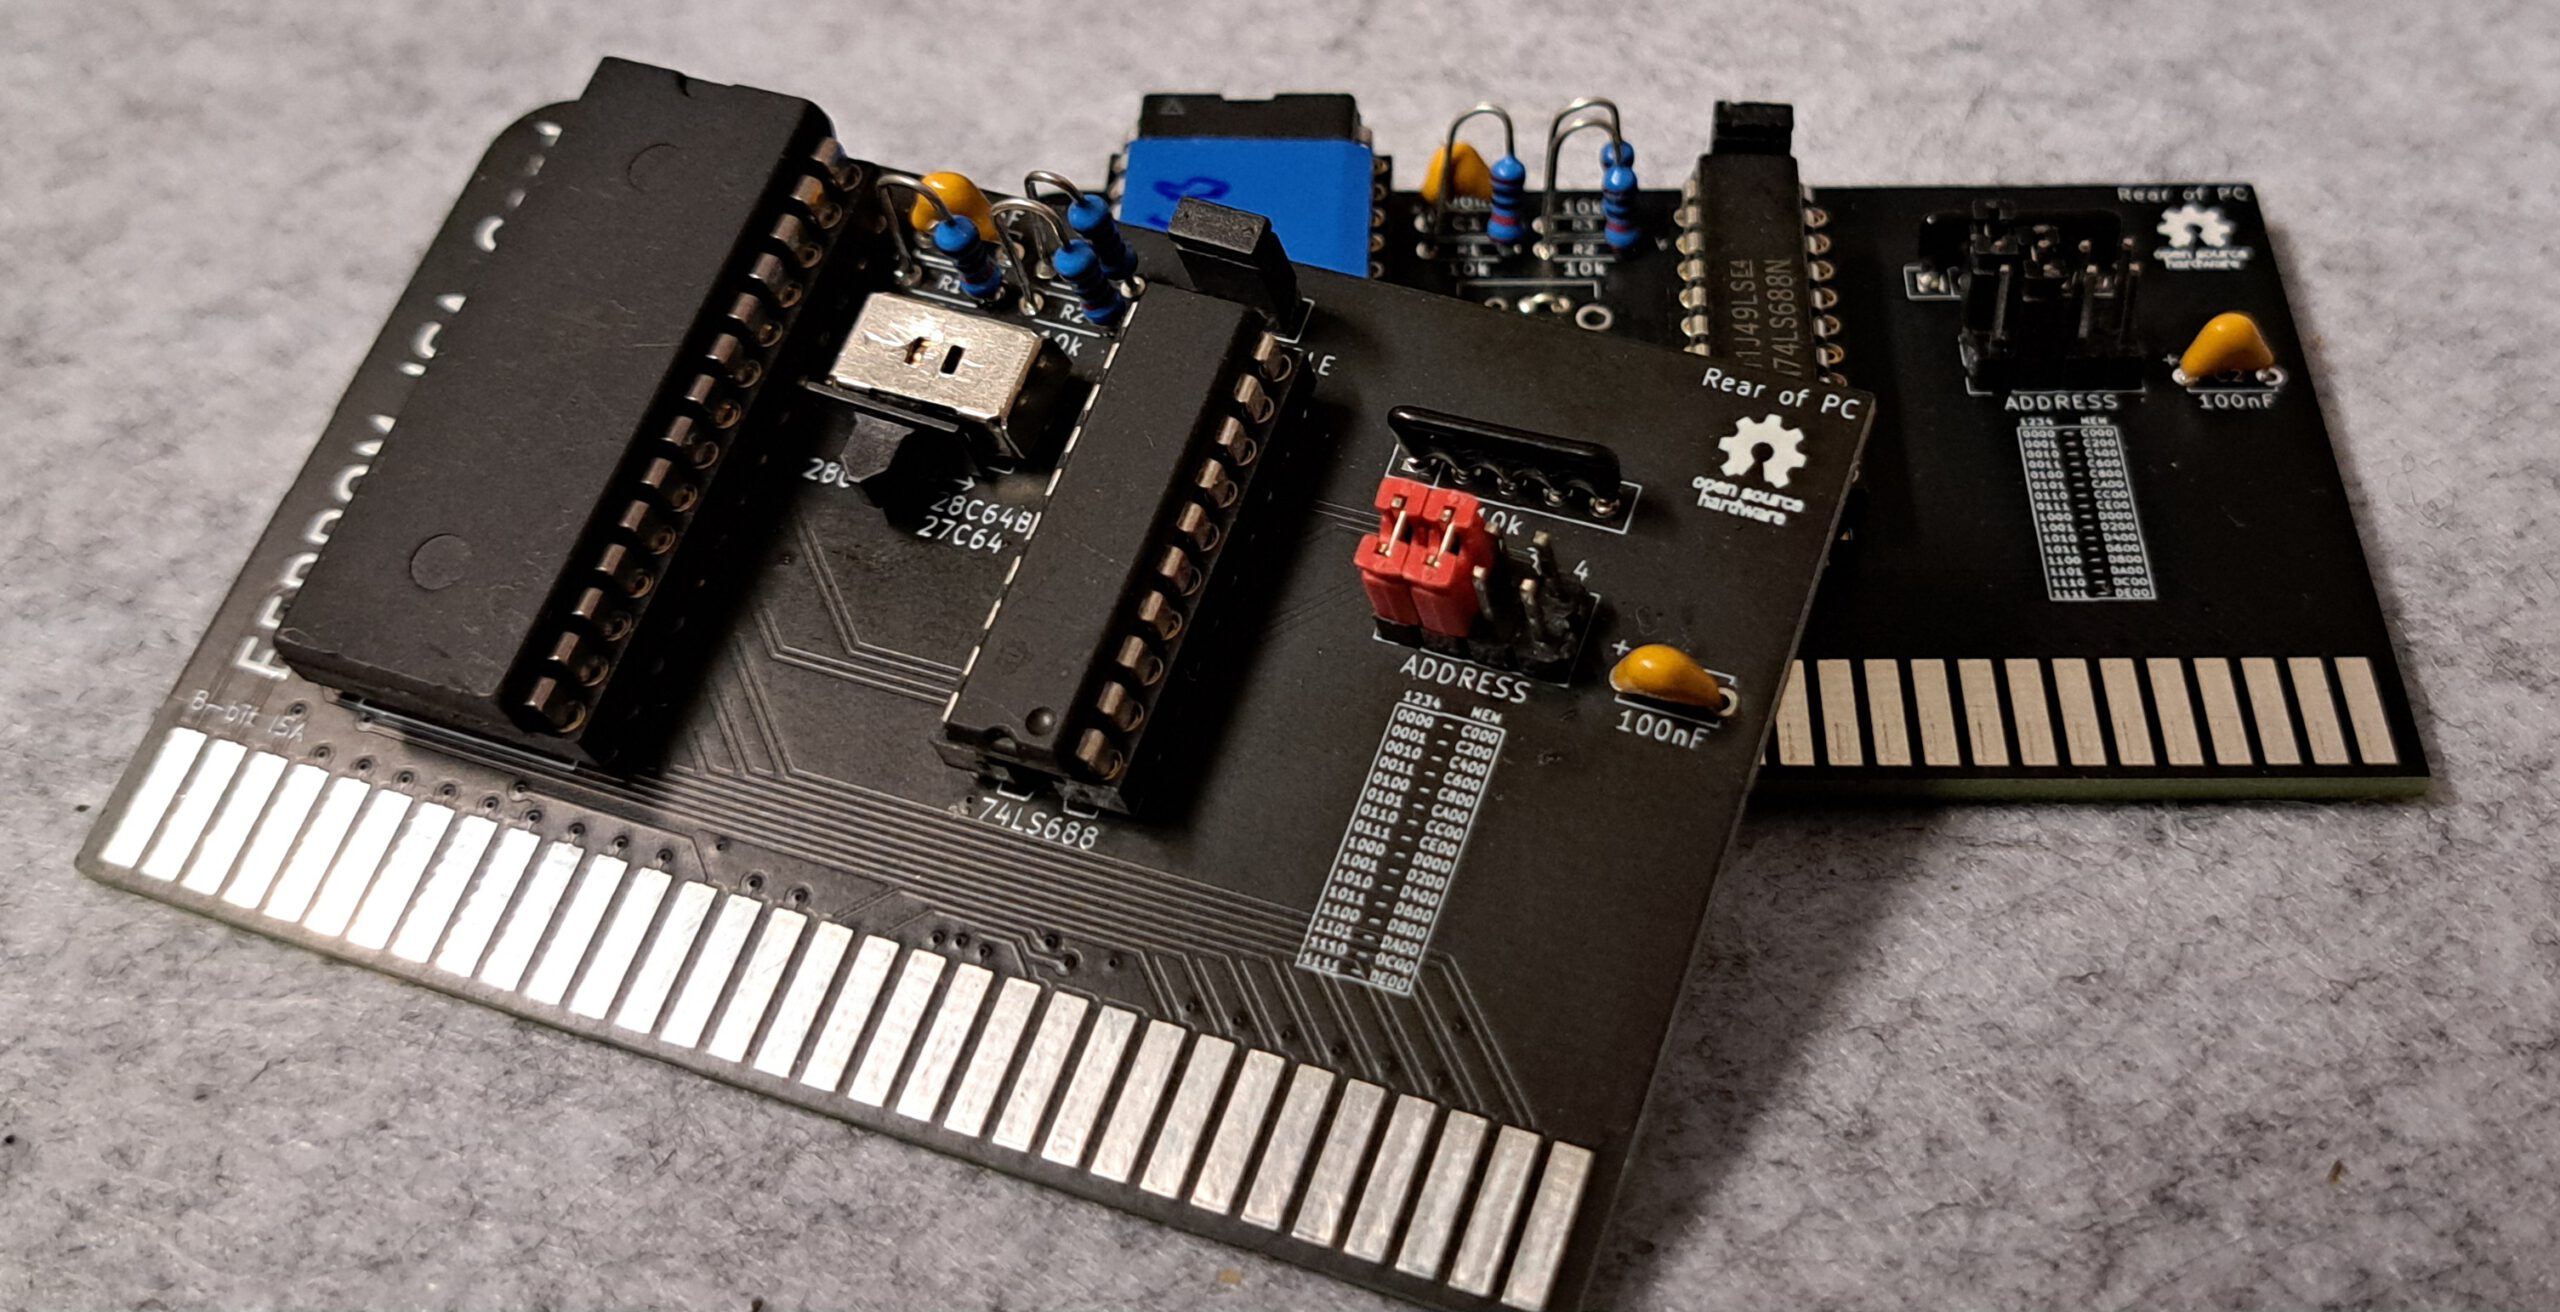
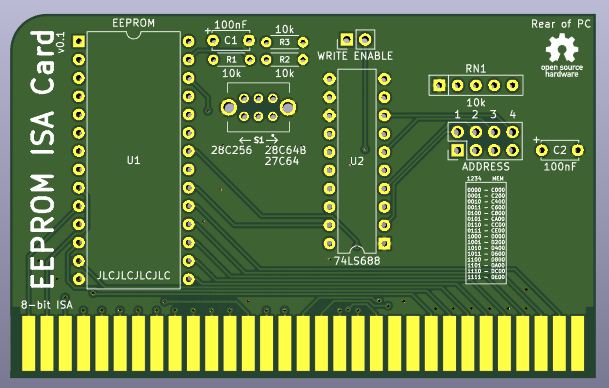
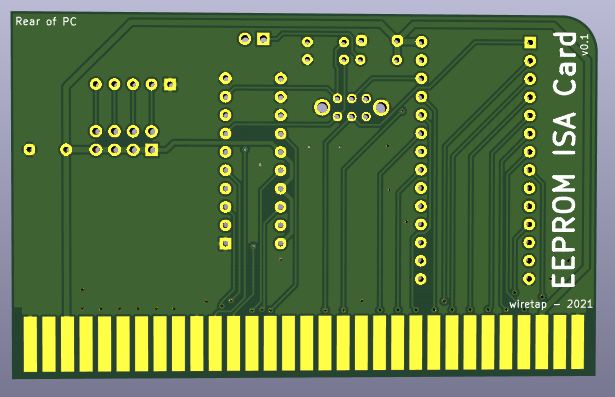
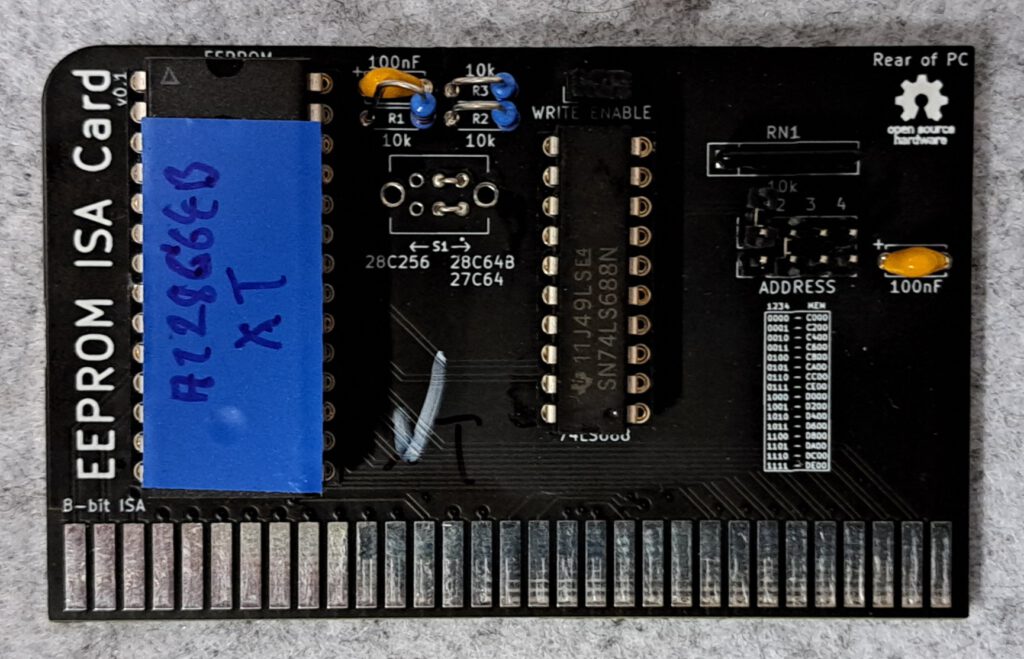
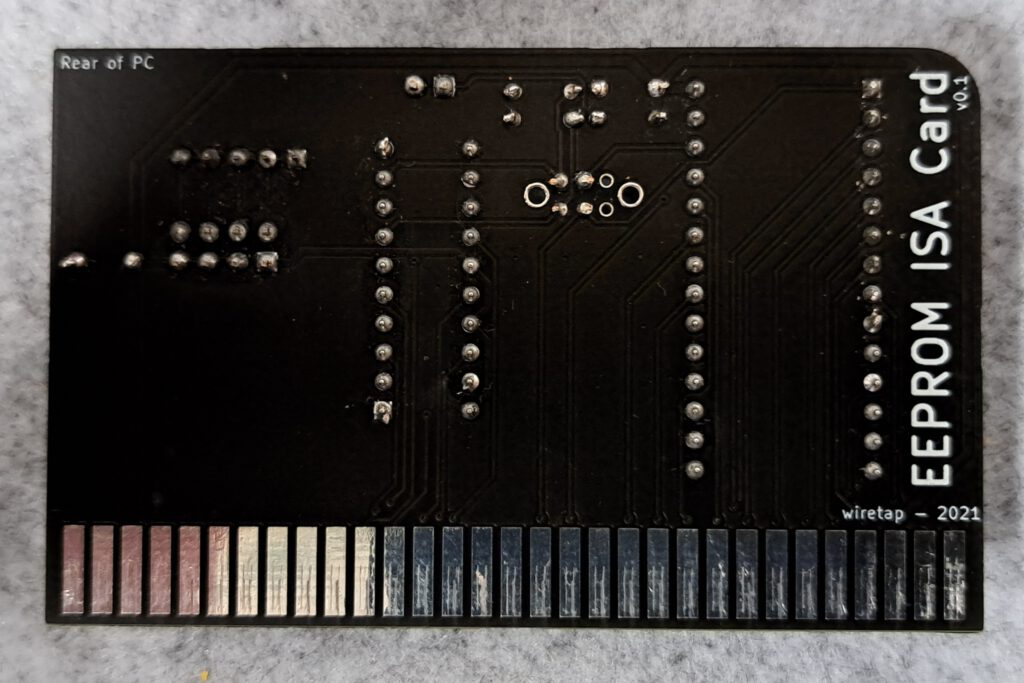
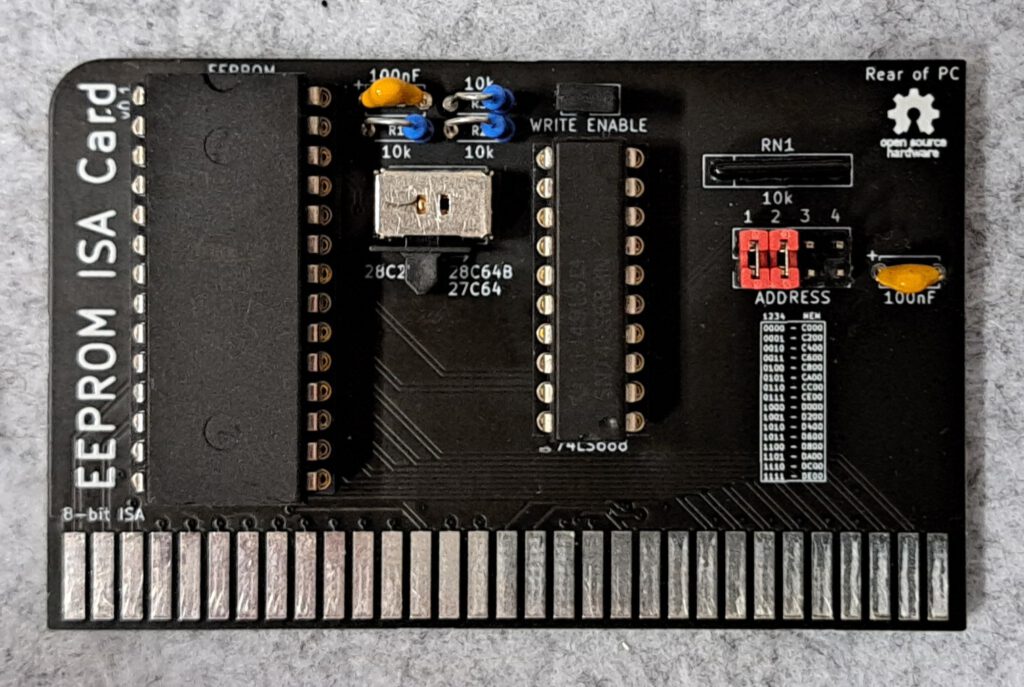
Einfache ISA Karte mit Platz für ein (U/E)EPROM des types 27C256, 28C256, 28C64B. Die 28C*** EEPRoms können mittels der Karte programmiert werden. Als ROM kann zum Beispiel XT-IDE Bios, XT-Ramtest or Roman verwendet werden.
Link to the project
CC-BY-4.0 https://github.com/wiretap-retro
Views
Facts
- Karte um ein ((U/E)EP)ROM in den PC einzubinden
- 8-bit ISA
- 27C256 UEPROM, 28C256/28C64B EEPROM, per Umschalter wählbar
- Adresse wählbar über Jumper
- Beschreiben des EEPROMS im System möglich, Schreibschutz Jumper (gesetzt keine Schreibschutz)
Schaltpläne
Documentation
| 1 | 2 | 3 | 4 | Address |
|---|---|---|---|---|
| 0 | 0 | 0 | 0 | C000 |
| 0 | 0 | 0 | 1 | C200 |
| 0 | 0 | 1 | 0 | C400 |
| 0 | 0 | 1 | 1 | C600 |
| 0 | 1 | 0 | 0 | C800 |
| 0 | 1 | 0 | 1 | CA00 |
| 0 | 1 | 1 | 0 | CC00 |
| 0 | 1 | 1 | 1 | CE00 |
| 1 | 0 | 0 | 0 | D000 |
| 1 | 0 | 0 | 1 | D200 |
| 1 | 0 | 1 | 0 | D400 |
| 1 | 0 | 1 | 1 | D600 |
| 1 | 1 | 0 | 0 | D800 |
| 1 | 1 | 0 | 1 | DA00 |
| 1 | 1 | 1 | 0 | DC00 |
| 1 | 1 | 1 | 1 | DE00 |
Assembly
Record
| Description | Worth |
|---|---|
| Gerber available | Yes |
| Gerber file | ISA-BOOT-EEPROM v0.1.zip |
| Ordered where | JLCPCB |
| Stück | 10 |
| Price | 15€ inclusive Versand und Steuern, im großen Paket |
| Special features | Lead-free, black |
Components
Die Bauteile habe ich beim schnellen Ali bestellt der Preis für eine Einheit lag bei ca. 2,10€ und ist damit nur unmerklich teuerer als die ROM Version.
| Component | Größe | Number | Description | Preis€/Stück |
|---|---|---|---|---|
| U1 | 64KB | 1 | EProm 27C256, 28C64, 28C256 | 0,70 |
| U1 | 28 Pin, Dip, Breit | 1 | Sockel für EProm | 0,21 |
| U2 | 74LS688 | 1 | IC 74LS688 Komparator | 0,42 |
| U2 | 20 Pin, Dip, schmal | 1 | Sockel Für 74LS688 | 0,12 |
| R1, R2, R3 | 10kOhm | 3 | Resistance | 0,15 |
| RN1 | 10kOhm, 5 Pin | 1 | Widerstandsarray 4x | 0,18 |
| J1 | 2 x 1 Pin, 2,54mm | Jumper Write Enable | 0,01 | |
| J2 | 2 x 4 Pin, 2,54mm | 1 | Pinheader pins zum Löten für Adresswahl | 0,02 |
| J2 | 2,54mm | max 5 | Jumper für Adresswahl und Write Enable | 0,05 |
| C1, C2 | 100nF | 2 | Kondensator Keramik | 0,12 |
| S(W)1 | SK22D02 | 1 | Schalter für Rom-Typ Umschaltung 5 mm 6-polig 2 Positionen 2P2T horizontaler Doppelschiebeschalter SK22D02GB5 0,74€ x1 | 0,08 |
| Summer | 2,06 |
Anmerkung zum Schalter: Das u.s. Format passte bei mir in die Platine, ein paar andere vorangegangenee Käufe passten leider nicht. Beim Schnellen Ali nach SK22D02-Schalter suchen.
Structure
Variations
Der Schalter kann durch zwei Lötbrücken ersetzt werden das spar ein paar Cent legt die Platine aber auf eine ROM-Größe fest.
Order
- Widerstände
- IC Sockel
- Kondensatoren und Widerstandsbrücke
- Pins für Jumper
- Rom programmieren (siehe unten)
- ICs und Jumper aufstecken
Commissioning
Firmware
Complierte XT-IDE Firmware für unterschiedlicher Prozessorgenerationen können unter folgenen Link heruntergeladen werden: https://xtideuniversalbios.org
Auch das Erstellen des Bios per angepasster Make Datei ist relativ einfach und das Toolkit schnell installiert. Eine Anleitung gibt unter folgenden Link: https://xtideuniversalbios.org/wiki/BuildInstructions
Ich habe das Thema schon einmal in folgenden Artikel behandelt und werde deshalb hier nicht weiter darauf Details sind hier zu finden: https://www.fambach.net/retro-xt-ide-bios/
Driver
Treiber sind keine nötig.
Configuration
Details gibts hier: https://www.fambach.net/retro-xt-ide-bios/
ROM mit Hardware programmierbar
- EEPROM auf Computer Karte stecken
- Comuter Karte in entsprechenden Slot im PC stecken.
- Bios und XTIDECFG auf Diskette oder Festplatte laden und den Rechner starten.
- XTIDECFG starten und das EEPROM konfigurieren.
- EEPROM flashen.
- Restart und alles sollte gehen wenn nicht mal im Kapitel Probleme nachsehen.
ROM nicht mit Hardware programierbar
- Bios und XTIDECFG auf Diskette oder Festplatte laden und den Rechner starten.
- XTIDECFG starten und das ROM konfigurieren.
- EPROM zurück auf das Speichermedium schreiben.
- Geän derte ROM vom Speichermedium lesen und per EPROM Programmer auf ein ROM breennen.
- EPROM auf Computer Karte stecken
- Comuter Karte in entsprechenden Slot im PC stecken.
- Computer starten und alles sollte gehen wenn nicht mal im Kapitel Probleme nachsehen.
Miscellaneous
Rom Tools
Flashrom – https://github.com/HowardHo2021/flashrom-DOS-port/releases
Uniflash – https://www.rainbow-software.org/uniflash/
GetRom – http://cd.textfiles.com/microhaus/mhblackbox3/MEMORY/GETROM.ZIP
Using Debug.exe under DOS
74LS688 Komaprator Datenblatt
27C256 64kByte UEPROM
General Tips
Soldering points
Check the solder joints on the ICs again carefully, preferably with a microscope or magnifying glass, for short circuits and contact. Measure with a multimeter or continuity tester.
For small solder joints on through-hole components, use flux if possible; it makes life easier and increases the quality of the connection.
Problems
XTIDE is not found on boot
- This is usually due to an address conflict, either with the ROM or because the wrong HDD controller address was specified. Even if the controller isn't found, XTIDE simply won't be displayed. Check all addresses again, and also check the jumpers on the ROM and controller boards. C800 and D800 have proven to be good values for the ROM address.
- Incorrect ROM used, some EPROMs and EEPROMs are not compatible. Cards can also only support the specified EPROM types. For example, I replaced a 27C256 with a 28C256, but it didn't work because the pinout deviates in two places. A 27C257 must be used here ;).
- When it comes to the ROM on the network card, ensure that it is active, that the size and address are set correctly.
Controller not found
Should the XTIDE be displayed unexpectedly, but the error "Controller not found" appears, then the address/type of the IDE controller is incorrect; check this again in the tool and re-flash the ROM.
Checksum Error
XTIDECONF did not run, this calculates the checksums and sets them. Run the tool and re-flash the ROM.
Rom lässt sich nicht über XTIDECFG Flashen
Incorrect ROM version, for example, the AT28C64-B can be flashed but the AT28C64 cannot. If you try to flash the AT28C64, the version on it will no longer work afterwards and the EPROM programmer must be used.
Conclusion
Schöne kleine Karte, erfüllt ihren Zweck und ist nicht teuer. Die Verwendung eines EEPROM macht die Karte weitaus flexibler als ihre ROM Version. Auch die Wahl zweier unterschiedlicher ROM-Größen ist ein schönes Beiwerk. Stände ich vor der Wahl zwischen der ROM und der EEPROM version, würde ich mich für die EEPROM Version entscheiden. Der Preis liegt nur ein paar Cent höher, für die zusätzlichen Bauteile und der Platine Preis ist der Gleiche.
| Description | Worth |
|---|---|
| Successful | Yes |
| Preis Pro stück | ~4€ |
| Lötdauer | 0,5 Stunden |
| Function | Super |
Verwandte Beiträge
Sources
To the project
https://rayer.g6.cz/romos/romos.htm
https://github.com/ki3v/xtramtest
Retro pages
https://archive.org – Old software, magazines, manuals, and much more.
https://theretroweb.com – PC Hardware Directory.
https://www.winhistory.de/index.php – DOS, Windows Version Descriptions.
Win 3.1x Tools and Tricks
Retro Forensics
https://forum.classic-computing.de/forum – German/English forum with many retro computer enthusiasts.
https://www.vogons.org – I have found many tips on hardware here, they also have a driver directory.
https://www.dosforum.de – Forum with strict rules and very helpful regarding DOS, Windows questions are not welcome.
https://dosreloaded.de – DOS, hardware repairs, BIOS files and more.
https://www.winhistory-forum.net DOS and Windows history.
Retro Shops
https://ram-co-shop.de - PC parts, including newer ones, have ordered a lot from there and it's always worked.
http://www.amoretro.de – Sold on eBay and has a nice directory of old hardware
https://retroreiz.de – Atari, Nintendo, Sega and others.
https://www.retroworld.info/de – Stickers, signs and more.
https://retesa-nb.de – Older PC hardware
https://www.retro8bitshop.com – C64 tricky
Logbook
| Date | Description |
|---|---|
| 08.03.2025 | Post Created |
| 30.03.2025 | Post finalized |
| 31.03.2025 | Bilder hinzugefügt und nochmal gegengelsen. |
| 02.04.2025 | Bilder hinzugefügt und finalisiert |
| Date | Change | Author |
|---|---|---|
| 01.04.2025 | Post created | Suffocation |