Last Updated on 4. October 2026 by SuffocationLink status: OK
Mein aktueller NVR (Network Video Recorder) hat so seine Tücken und ich suche nach einer Alternative. Das alte Modell von Corseer, war zwar das für mich am besten funktionierende unter allen 6 Modellen, welche ich getestet hatte, aber es gibt keine Updates mehr, 2 von 4 Kameras funktionieren nicht und Corseer erlaubt, wie andere Hersteller auch, nur eigene Kameras.
Da dachte ich mir, hier gibts doch sicherlich auch was für den Raspberry Pi. Nach kurzem Googeln fand ich die Software von ShinobiLink status: OK die auf dem Raspberry schon erprobt wurde. Die Installation auf einem bestehenden Raspberry und deren Konfiguration will ich in diesem Bericht kurz umreißen. Da ich in den letzten Monaten immer mal wieder mit diversen ESP CamsLink status: Unknown gespielt habe, wäre es zudem nett, solch eine Kamera einzubinden.
If the Raspberry still needs to be installed, then hereLink status: Unknown A brief guide.
Facts
Shinobi itself is managed and controlled via a web interface, which simplifies deployment within your own network. The software is intended to run on a Raspberry Pi from version 3B upwards.
Areas of application
- IP Camera Video Recorder
- Nummernschild Erkennung
- Motion detection
- Camera control
- Remote control via web interface
Cameras
There aren't many prerequisites for the cameras:
- It must be an IP camera
- The transmission protocol should be supported by Shinobi.
- ONVIF support wouldn't go amiss.
- She must be accessible via the PI over the network
Versions used by me
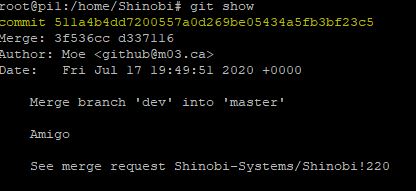
- MariaDB 10.1.45-MariaDB-0+deb9u1
- Raspbian 9.11
- Ninja
Hardware used
- Raspberry PI 3b + PI 4 mit 4 GB
- ESP32 Cam
Licence
Der Sourcecode ist frei. Für die Nutzung gibt es ein einfaches Lizenzmodell. Für nicht kommerzielle Zwecke gibts eine freie (CE) Version und für den kommerziellen Gebrauch eine Pro Variante mit Subskription.
Die freie, auch Community Version genannte Variante, wird nur zu Hauptversionen geupdatet oder wenn Bugfixes eingespielt werden. Die kommerzielle Version ist hier agiler.
More details, please. Manufacturer's page Link status: OKextract.
Views
At this point, here are a few impressions of the interface, more on that later.
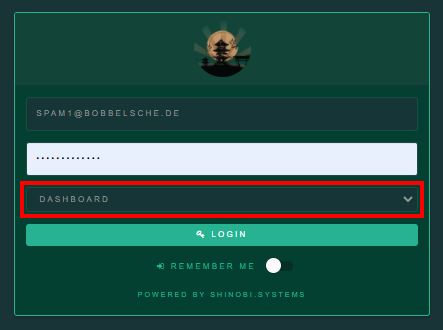
Shinobi Login Dashboard 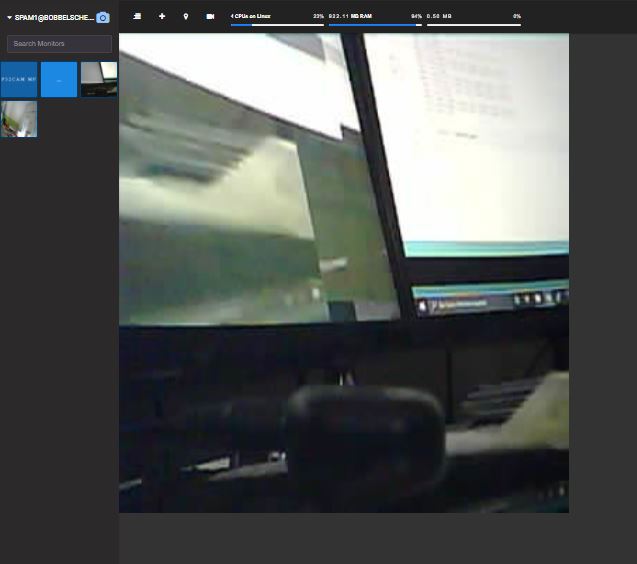
Shinobi ESP32Cam JPEG A first image 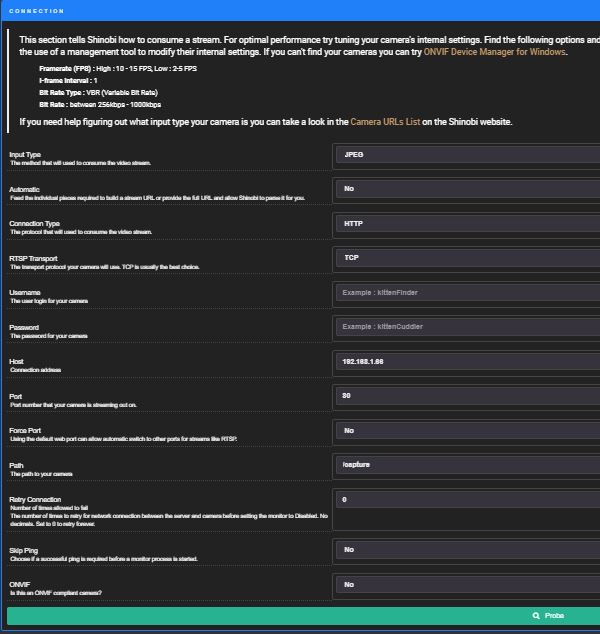
Shinobi ESP32Cam JPEG Settings Connection 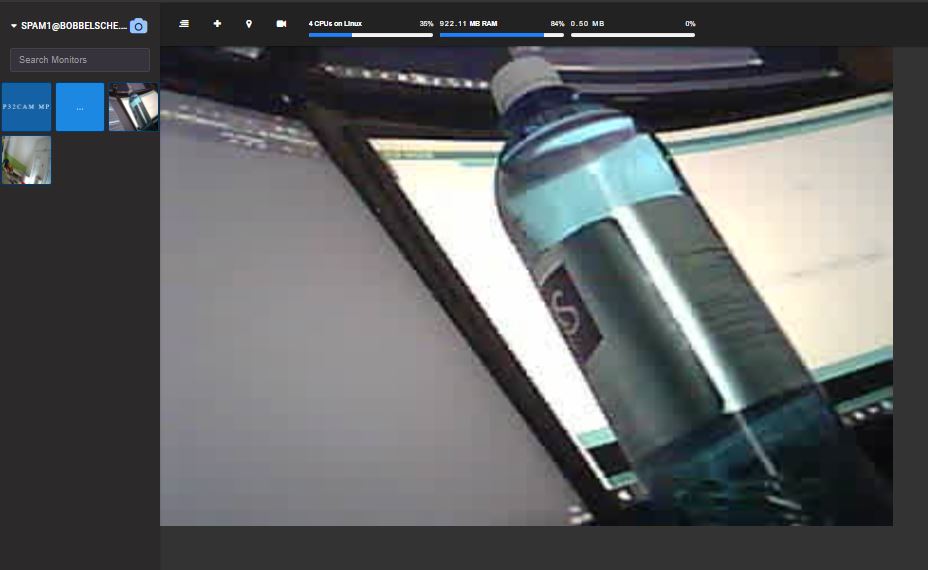
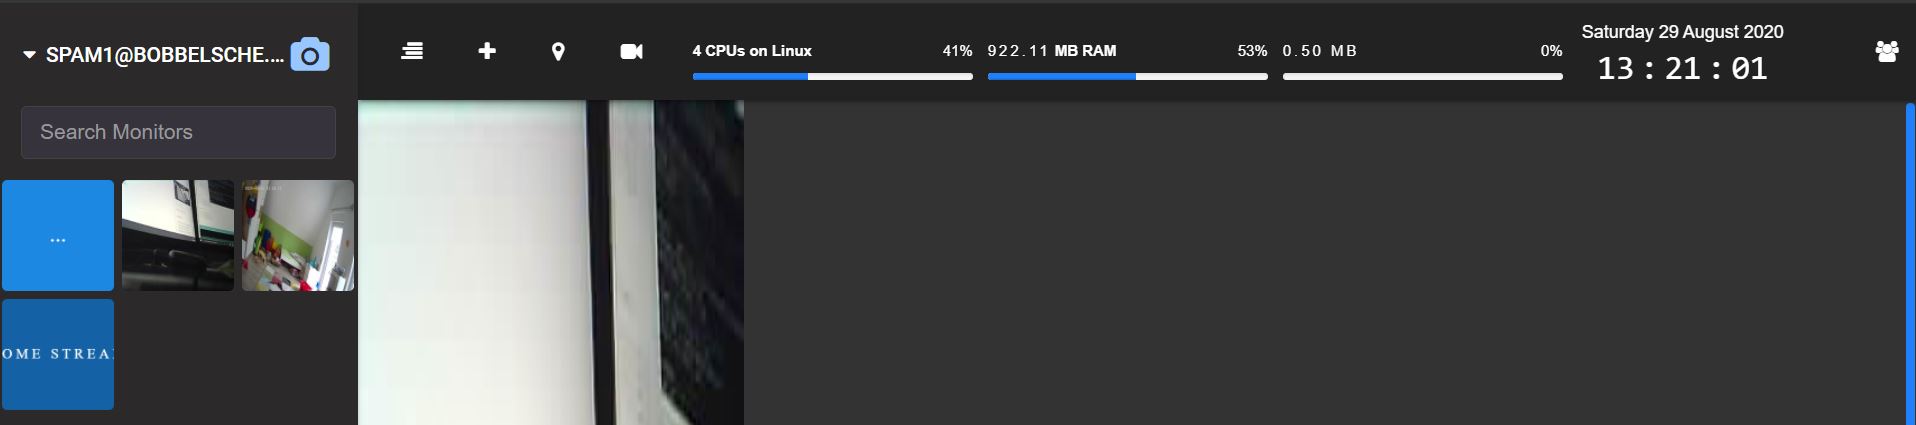
Shinobi ESP32Cam MJPEG First Look Through the Camera
Installation
Shinobi bietet ein Installationsskript. Zur interaktiven Installation die folgenden Zeilen über SSH oder Console eingeben:
sudo su
bash <(curl -s https://gitlab.com/Shinobi-Systems/Shinobi-Installer/raw/master/shinobi-install.sh)
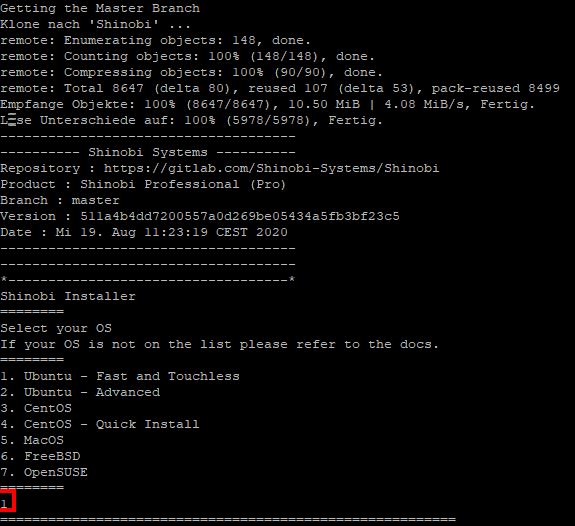
Dann durch das Konsolenmenü navigieren. Ich habe die Installation mal im Standardverzeichnis gestartet, andere werden hier lieber srv o.ä. wählen wollen.

For configuration, I'll choose Ubuntu, which seems to work well on the Pi according to the web.
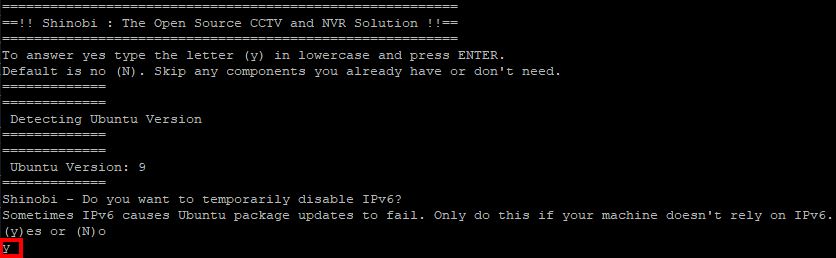
IPv6 ist mir nicht wichtig, da ich noch hauptsächlich IPv4 verwende.
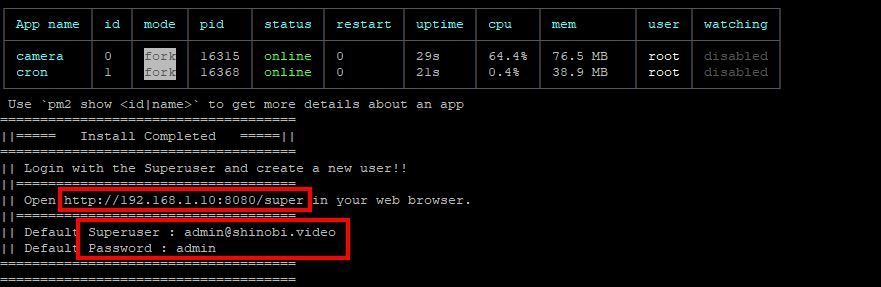
Finally, the login details for the browser will also be displayed.
Change port
I already have a Tomcat installed, so I can't use port 8080. Therefore, I have changed the port to 8081. This is done in conf.json in the Shinobi installation directory (in my case /home/Shinobi).
root@pi1:/home/Shinobi# vi conf.json
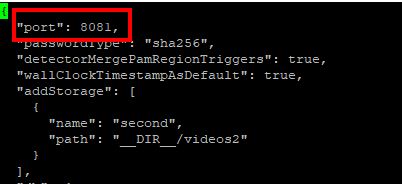
Change the port from 8080 to 8081 and save.
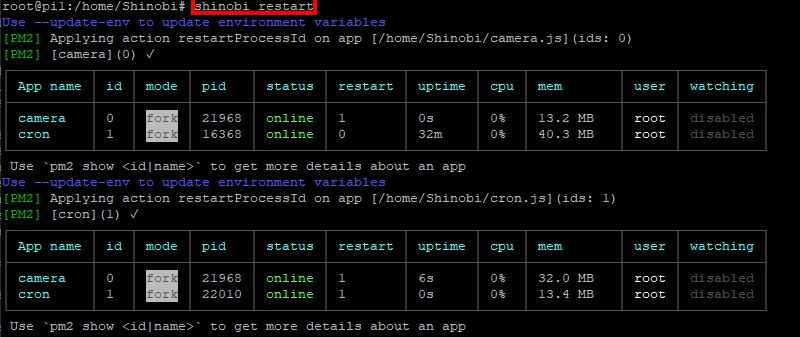
Shinobi neu starten:
root@pi1:/home/Shinobi# shinobi restart
Initial configuration
First login
The link now looks like this for me:
http://192.168.1.10:8081/superOpen this in a browser and fill it in with the login details from the console.
Default Superuser: admin@shinobi.video
Default Password: admin
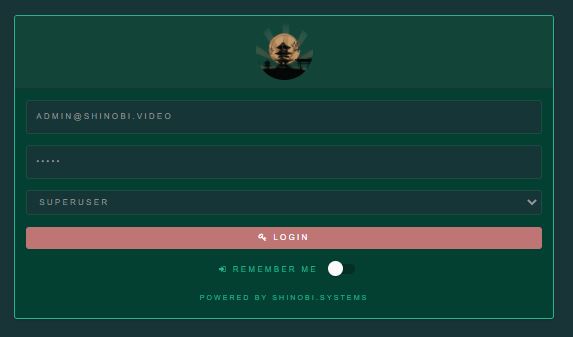
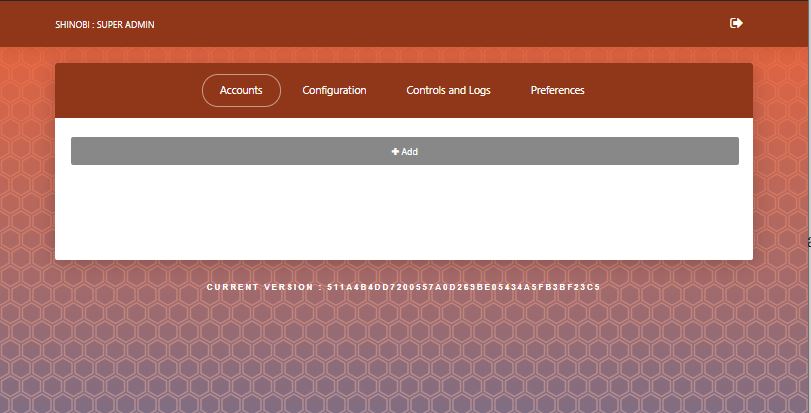
Sollte nicht das folgende Bild kommen, schaut mal im Kapitel Probleme nach, evtl. gibts dort eine Lösung.
Change Superuser Password
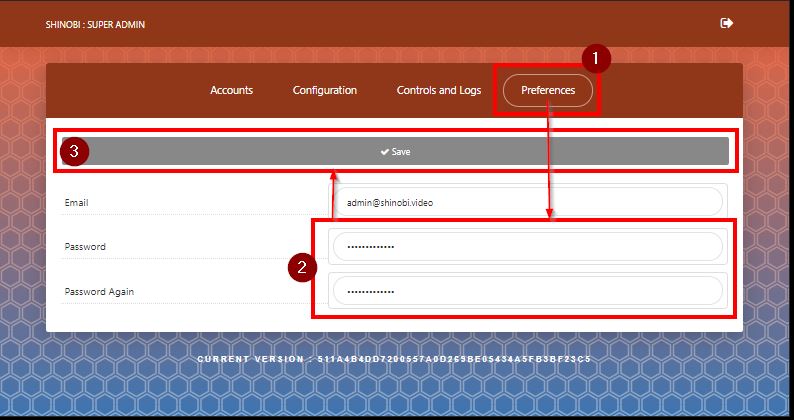
Aus Sicherheitsgründen sollte als Erstes das Superuser Passwort geändert werden, damit kein anderer auf den NVR administrativ zugreifen kann.
Im Menü den Eintrag „Preferences“ wählen, zweimal das neue (sichere) Passwort eingeben und mit dem Knopf „Save“ bestätigen. (Den Knopf, auch wenn er sehr groß ist, habe ich erst auf den zweiten Blick gefunden. Würde ihn eher am Ende der Seite erwarten.)
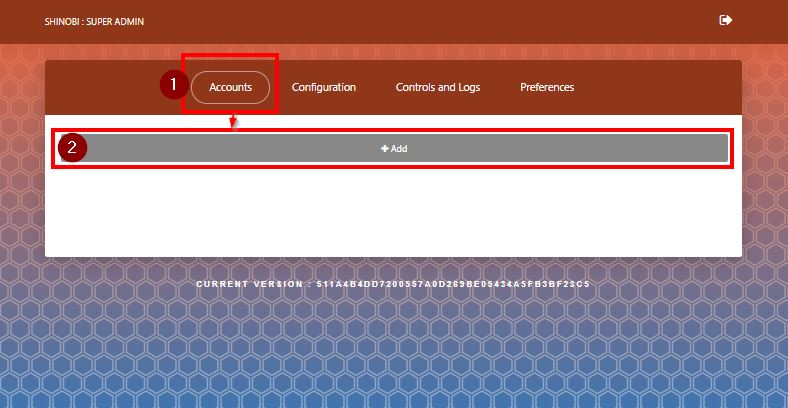
Create user account
Account Erstellung starten
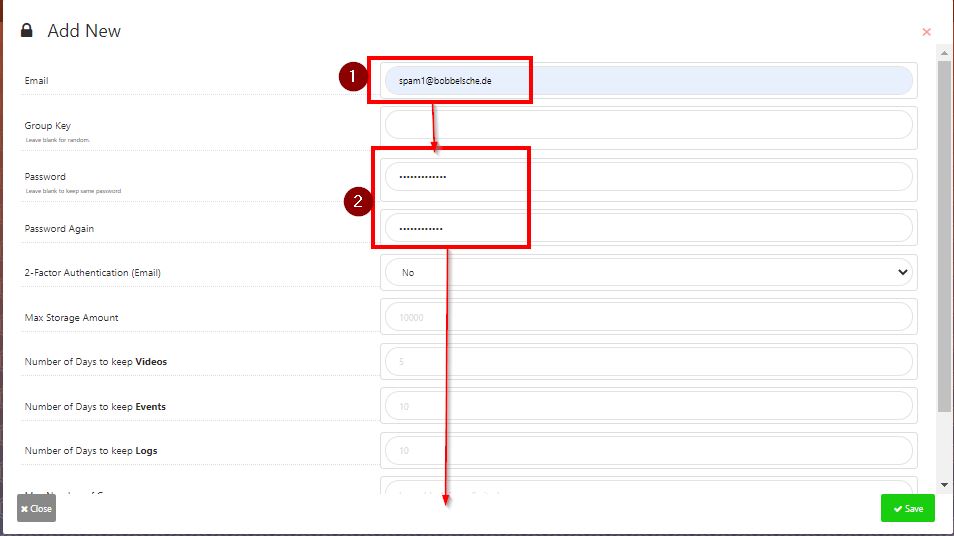
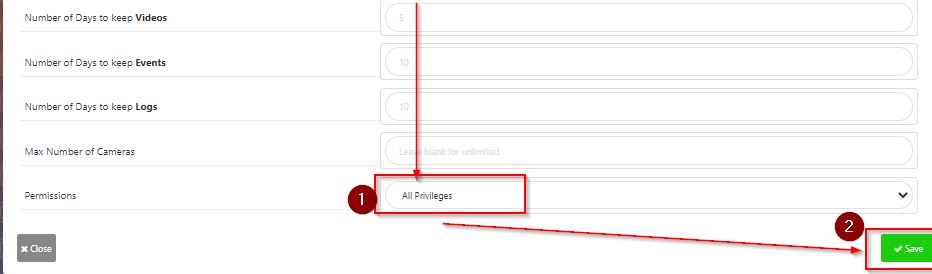
Enter email address and choose a password.
Erstmal alle Privilegien, später können wir das noch einschränken. Mit Save (oh der Button ist ja unten 😉 ) bestätigen.
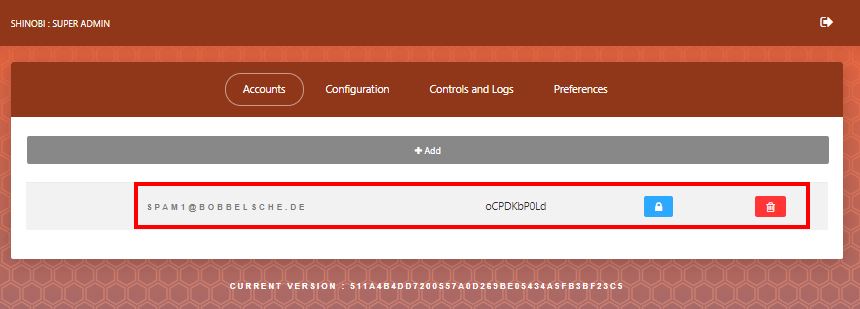
A new user has been created.
Basic settings
Die Einstellungen können erst einmal so bleiben, wie sie sind.
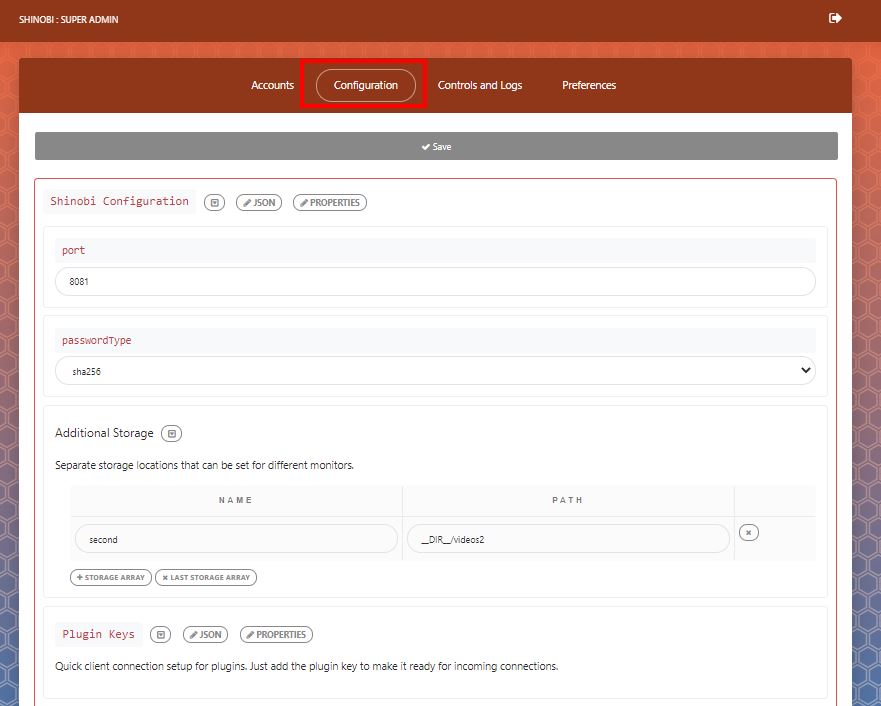
Beim Durchstöbern ist mir noch aufgefallen, dass das DB Passwort fehlt. D.h. es gibt einen Benutzer ohne Passwort in der Datenbank.
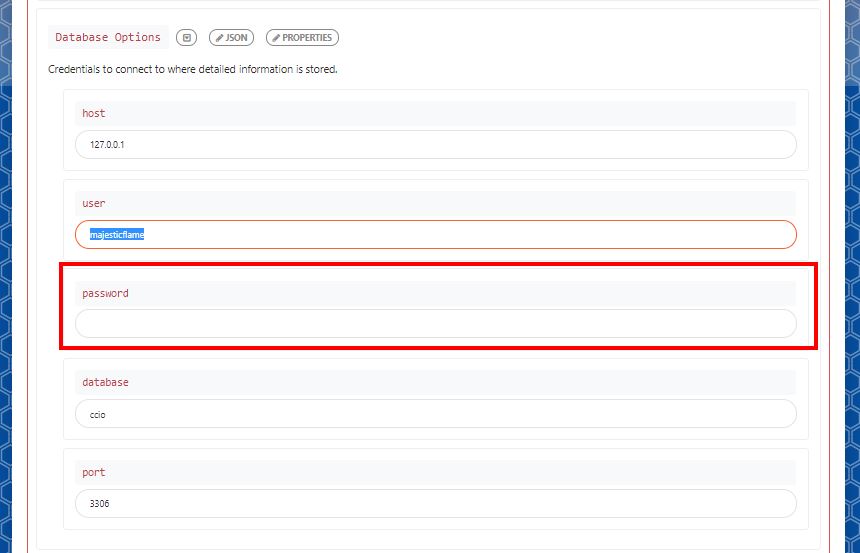
I only changed the password in the settings and saved it:
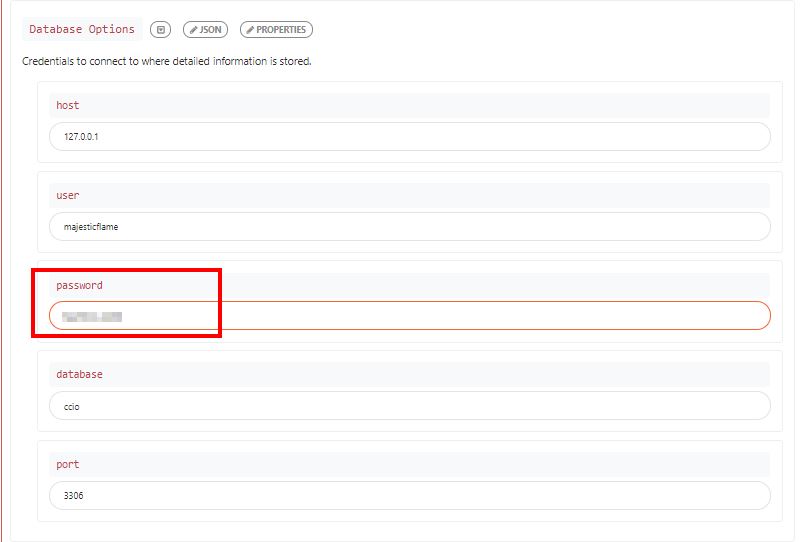
After that, set the password in the database:
Open MySQL client
mysql -u root -h localhost -p.Folgendes Skript absetzen
SET PASSWORD FOR majesticflame@127.0.0.1 = PASSWORD('Das_Neue_Passwort');
EXIT;
Restart Shinobi
root@pi1:/home/Shinobi# shinobi restartCamera Configuration
Die Einstellungen, die Shinobi bietet, sind wirklich erstaunlich. Wenn man neu in die Materie einsteigt, weiß man nicht, wo man anfangen soll ;). Hier mein Weg mit der ESP32 Cam. Ich habe zwei Konfigurationen erstellt. Eine mit MPEG Stream und eine mit Jpeg Schnappschüssen. Aber zuerst mal in das Dashboard einloggen.
Log in
URL is
http://<IP>:<port> In my case, it is:
http://192.168.1.66:81Afterwards, log in with the newly created user.
Ein erster Blick auf die strukturierte Oberfläche.
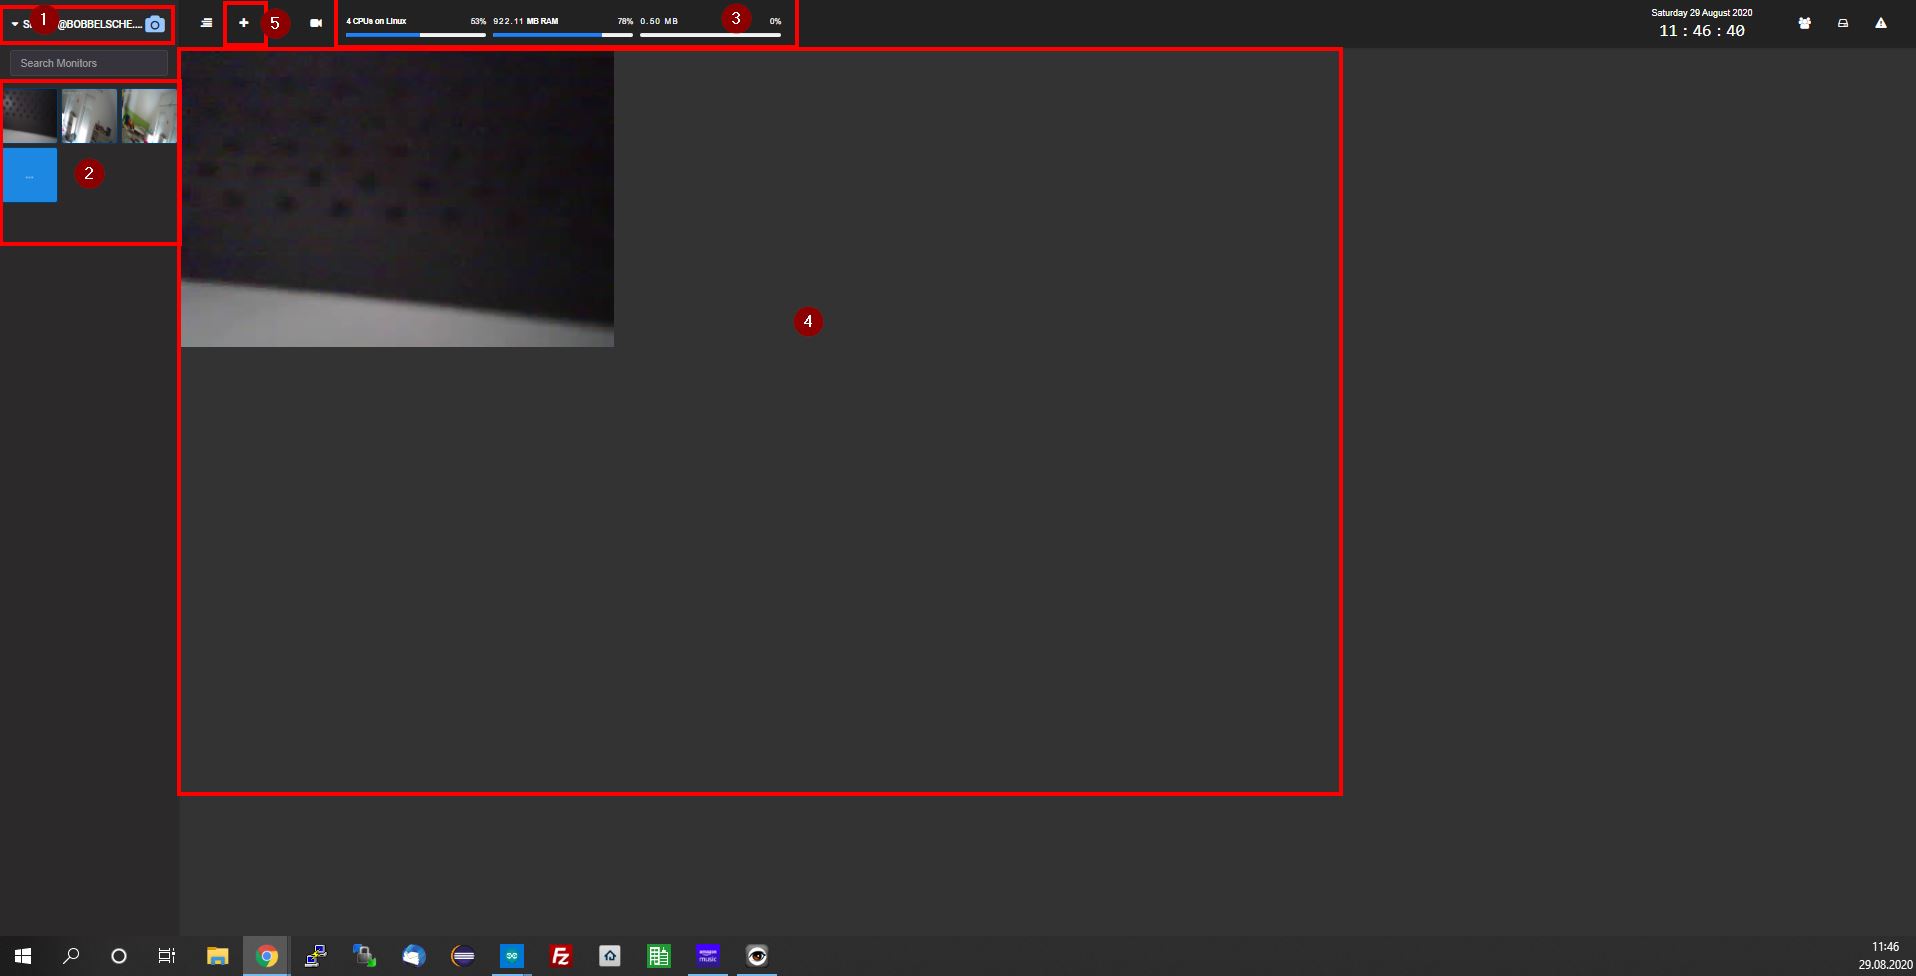
- Funktionsauswahl – hier gibts alle Arbeitsmodi, auch sowas wie einen Onvif Detector
- Monitor list, each monitor roughly corresponds to a configured camera
- Some information about CPU utilisation, RAM and hard drive space.
- Open monitors, here the camera streams can be viewed
- Neben anderen Knöpfen ist hier der + Knopf zum Hinzufügen einer Kamera.
Um einen Monitor (Kamerakonfiguration) zu erstellen, wird der + Knopf betätigt. Dies habe ich im Folgenden zweimal getan. Einmal für die MJPeg Konfiguration und nochmal für die JPeg Einzelbilder.
MJPeg Configuration
Namen eingeben, dieser wird dann in der Übersichtsanzeige links mit angezeigt. Der Rest in diesem Abschnitt bleibt unberührt.
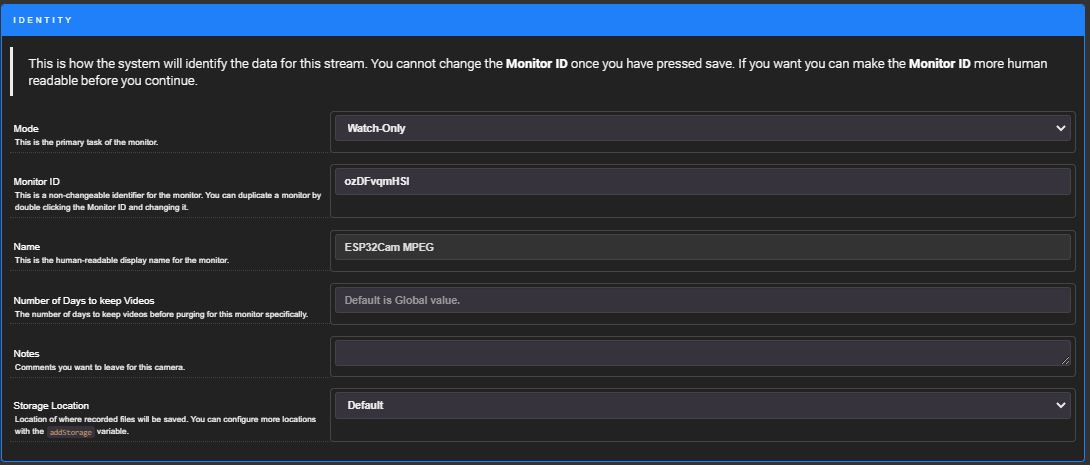
For the connection, enter the MJPEG type and the URL.
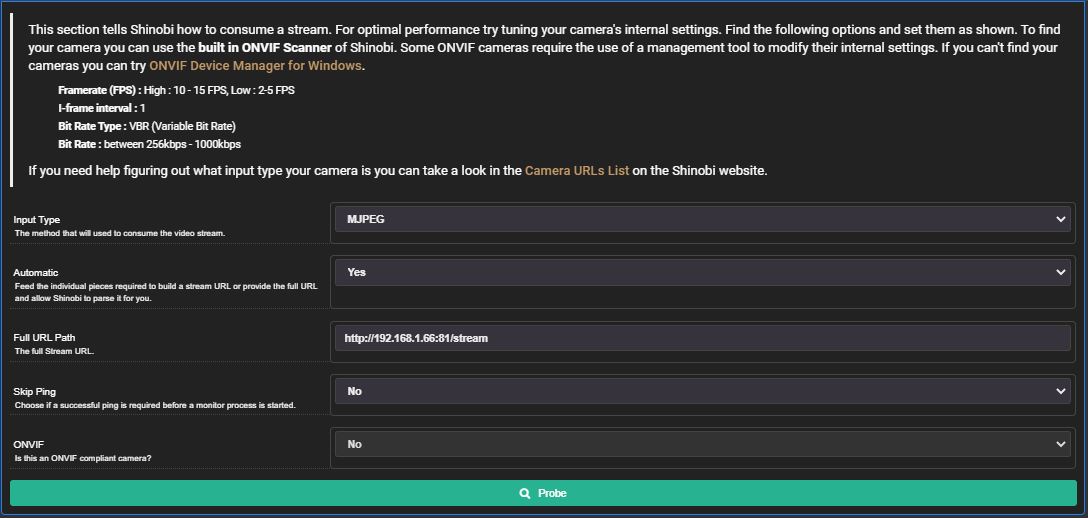
Den Eingang noch konfigurieren. Mit diesen Werten kann zwecks Optimierung noch gespielt werden. Die Framerate habe ich auf 3 gesetzt, was so der Durchschnitt der ESP32-CAMLink status: OK mit einer Auflösung von 800×600 bei mir ist. Die Hardware Beschleunigung lasse ich erst einmal aus, um Fehlerquellen zu reduzieren.
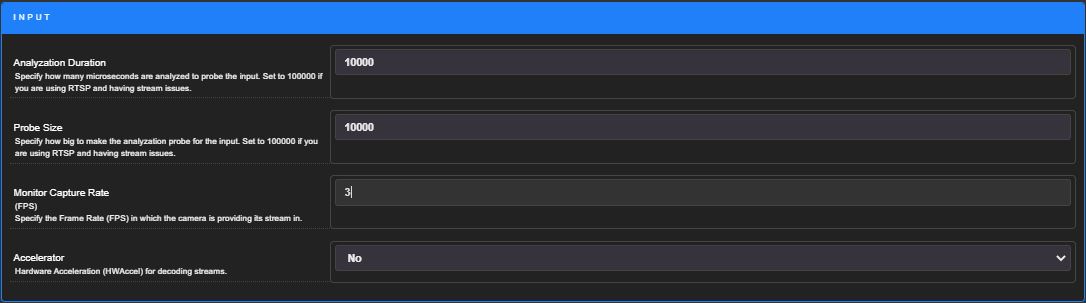
The stream settings have been chosen very conservatively.
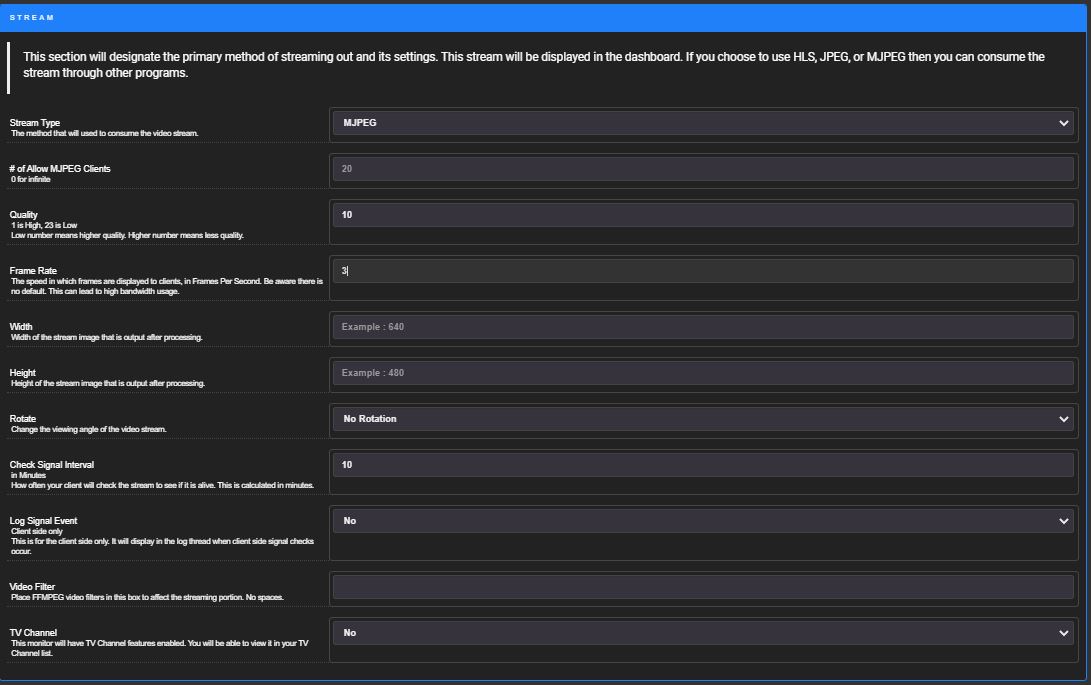
Mit diesen Einstellungen konnte ich erste Bilder anzeigen lassen. Es dauert eine Weile, bis das erste Bild kommt, also etwas Geduld haben. Sicher lassen sich die Einstellungen optimieren.
I'm getting a slow slideshow. Even various adjustments to the settings didn't lead to an improvement on my RPI3. In ISpyLink status: OK getestet, läuft es flüssiger.
JPEG Configuration
Here is the single image configuration. Give it a descriptive name.
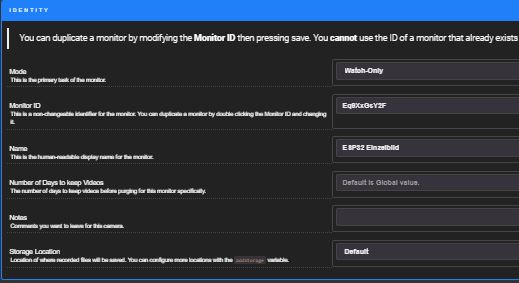
Set JPEG.
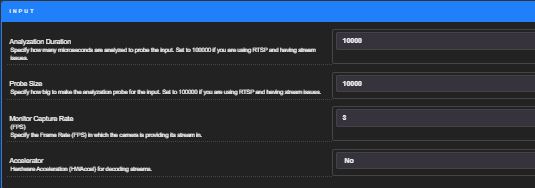
Den Eingang konfigurieren. (Hardwarebeschleunigung erstmal aus, um Fehler zu vermeiden)
Finally, set up the stream.
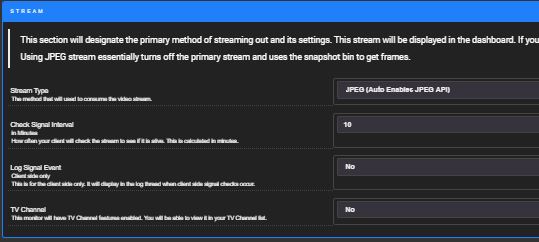
This is how it looks on my end. The images come through more smoothly and clearly than with the MJPEG stream.
Problems
Website not found
Bei mir ist bereits ein Tomcat installiert. Dieser hat natürlich nicht die Shinobi Applikation verfügbar, was das Bild unten erklärt. Ich habe den Port des Shinobi Servers geändert, siehe hierzu auch the relevant section in the Installation chapter.
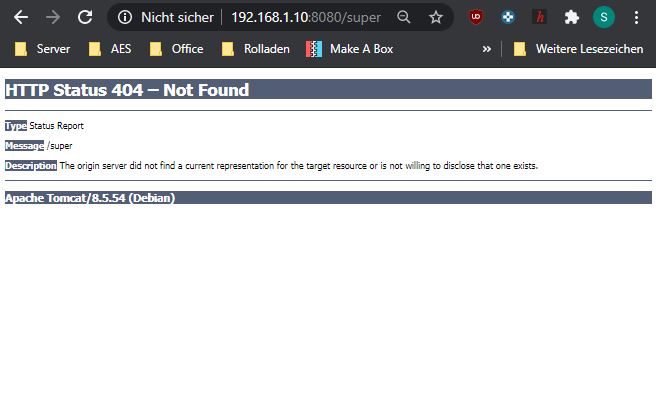
Database not accessible
The database was not installed with it for me. This is what it looks like after the superuser login:
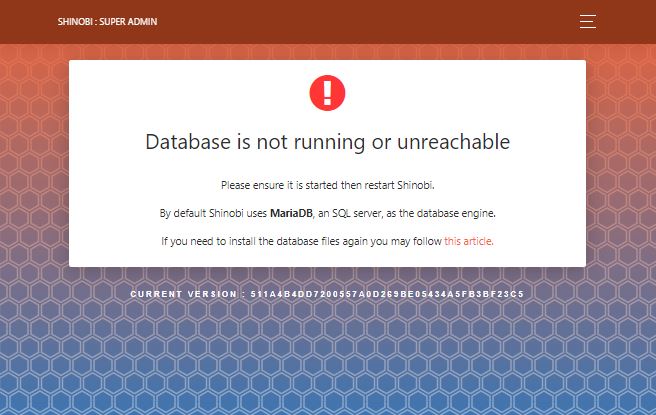
Datenbank manuell nachinstallieren. Ich werde dies hier nur kurz umreißen, der Vorgang ist unter folgendem Link gut beschrieben: https://staticfloat.de/mariadb-10-auf-raspberry-pi-installierenLink status: Unknown
Install DB Server and Client
sudo apt-get install mariadb-client mariadb-serverServer einrichten
Create root and define password.
sudo mysql -u root -pIn der Sql Console Privilegien bestätigen und die Console schließen
flush privileges;
exit;
Configure my.conf
sudo nano /etc/mysql/my.confInsert the following lines:
port = 3306
bind-address = :: # (all IP addresses permitted)
Speichern und weiter gehts mit der Sicherheit. Den folgenden Befehl ausführen und die Fragen nach bestem Wissen und Gewissen beantworten.
sudo mysql_secure_installationRestart the database now
sudo /etc/init.d/mysql restartNun noch die DB installieren (Genauer ist das hereLink status: OK (described). To do this, navigate to the Shinobi installation directory and start the client
cd /home/Shinobi
mysql
Now execute the following lines
source sql/framework.sql;
source sql/user.sql;
exit;
Restart Shinobi
pm2 restart all
Langsames Daumenkino
Die folgende Seite gibt ein paar Tipps, wie die Leistung verbessert werden kann.
https://www.raspberrypi.org/forums/viewtopic.php?t=220699Link status: Unknown
Set GPU memory to 256MB
sudo nano /boot/config.txtGPU Speicher auf 256MB hochsetzen
gpu_mem=256 or gpu_mem_256A reboot is required.
I tried the whole thing on the PI4, as the hardware acceleration is supposed to be better here.
Miscellaneous
NVIDIA Jetson Nano
Der Einplatinencomputer Jetson Nano von NVidia soll in der Video- Verarbeitung besser sein. Mit seinen rund 130€ ist er zwar mindestens doppelt so teuer wie der PI4, soll aber bis zu 34 parallele Streams verarbeiten können. Hier ein Link zur Konfiguration.
https://hub.shinobi.video/articles/view/i1bbMtvqC2NO1B2Link status: OK
Conclusion
Es klappt. Die Software macht, was sie soll. Die Installation ist einfach, auch wenn ich die Datenbank bei mir nachträglich installieren und initialisieren musste.
Die Performanz des PI3 scheint leicht an ihre Grenzen zu stoßen, zumal ich noch andere Prozesse auf ihm laufen habe. Der PI4 mit 4GB hat hier mehr Reserven.
Für kleinere Projekte mit wenigen Kameras und zum Testen der ESP Cams kann ich Shinobi auf dem PI empfehlen, besonders auch, da sich die Investitionen in Grenzen halten.
Ich werde noch andere Kameras mit ihm testen. Ob diese Kombination mein neuer NVR wird, wage ich jedoch zu bezweifeln. Evtl. werde ich mir mal den Jetson Nano ansehen. Ich tendiere jedoch mehr dazu, den Intel I5 aus meinem alten Rechner als kleinen Server mit Ubuntu aufzubauen.
Wenn ihr Anregungen oder zum Beispiel zur besseren Konfigurationen habt, lasst einen Kommentar da, ich freue mich über jeden Beitrag, der keine Pillen verkaufen will 😉 . Auch wenn ihr Details braucht, lasst eine Nachricht da, ich werde versuchen den Beitrag zeitnah zu ergänzen.
Related Posts
- MPV (Linux)Link status: OK
- ISpyLink status: OK
- VLC Media PlayerLink status: OK
Sources
Manufacturer's page for ShinobiLink status: OK
Good and brief introductionLink status: Unknown
Install MariaDBLink status: Unknown
Problem explanation with email settingsLink status: Unknown
PI OptimisationLink status: Unknown
MJPEG Cam hinzufügenLink status: OK
Error searchLink status: OK
Shinobi with Jetson NanoLink status: OK
Meine Google SucheLink status: OK
NVR programme list on GitHubLink status: OK
| Date | Change | Author |
|---|---|---|
| 04.10.2026 | Rechtschreibung korrigiert: Tippfehler, Kommas, Groß-/Kleinschreibung, Grammatik | Suffocation |
| 03.10.2026 | Log-Liste eingefügt | Suffocation |
| 18.08.2020 | Post created | Suffocation |
Thank you very much!
Finally found a good guide for software that works well!
Hello,
I have previously operated my two ESP32-Cams on a RasPi 3 with MotionEye as the software. However, MotionEye has been causing problems with motion-detection-controlled video recording for some time now, and, unfortunately, I cannot get the error fixed.
I would like to try out some other (free) software on a RasPi 4 and I've seen that you've tested iSpy and Shinobi here.
What's the difference?
or.
Which software is more recommendable?
Hi, iSpy is for Windows, unfortunately with both I only tested the installation and didn't get any further. I use iSpy on Windows now and then to test a camera. I also still have Shinobi installed on the Pi, but I don't use it anymore.
Hello
Stefan
Okay. Thanks.
Today I tried to install the ISpy execution for RasPi (Agent DVR), without success. The prerequisites with OpenCV etc. are too high for me.
I'll give Shinobi a try, then.
Hi Stefan,
Since when, what software are you using instead of Shinobi?
Hello
Green
Morning Gruen,
I'm not currently using any, but I wanted to try Shinobi with the Nvidia Jetson Nano, but I haven't got around to it yet.
Hello
Stefan
Hello Stefan,
Thank you for the detailed instructions.
Everything has run through so far, but unfortunately Shinobi can’t „find“ the „PM2“ command. Even when I try „pi@raspberry:~ $ PM2 restart all“ in the terminal, it reports: „bash: pm2: command not found…’
Can you help me further? – As far as I've found out, it has something to do with node.js... but unfortunately, I don't quite understand the details 🙁
I'd be grateful for any tips and ecstatic with a solution 😉
Best regards from Vienna,
Klaus“
Hello Klaus,
Unfortunately, I'm not the expert on that either. But try installing the PM2:
sudo npm install -g pm2
I got the info from:
https://desertbot.io/blog/nodejs-git-and-pm2-headless-raspberry-pi-install
You may need to run pm2 as sudo.
Greetings from Sulzbach im Taunus
Stefan
Hello Stefan,
Unfortunately, that's not working with access to shinobi.
"Shinobi process is not running" means that the Shinobi software, which is likely a video surveillance system, is not currently active or operating.
I also cannot execute a Shinobi restart.
I’ve also changed the port to 8081, but to no avail. The certificate doesn’t seem to be the problem; Edge says the address 192…:8080/super is unreachable. I’ve also got Open Media Vault running on the Raspberry Pi, and its interface can be accessed without any issues via the IP address.
Hello Fritz
Unfortunately, I can't say that definitively, but the fact that the Shinopi process isn't running is already an indication. I think it should be.
I assume you've already checked the log and searched online for why the process might not be starting. I'd like to take a look at it myself, but I don't have time at the moment.
However, what I can say is that it worked for me right away, and I also tried it on a PI3 and a PI4 with Open Media Vault (what a surprise, it just made sense :) ).
I'm sorry I can't help with that.
Hello
Stefan
Hello,
I have received the message „Install Completed“.
I am now supposed to log in to the browser at IP 192.168.....:8080/super. Unfortunately, I am denied access with the message „The connection to this WEB page is not secure“. Is the problem with my system or with Shinobi? I would appreciate some feedback.
Hello Fritz,
I only know it from the browser. It's always displayed when it's not an HTTPS request, meaning an unencrypted transfer to a website.
You should have a button there with "more options" and then select "visit website anyway".
In the link here, this is also described in more detail.
https://www.pctipp.ch/praxis/internet/wenn-der-webbrowser-meckert-verbindung-ist-nicht-sicher-2003518.html
Hello
Stefan