Last Updated on 18. October 2026 by SuffocationLink status: OK
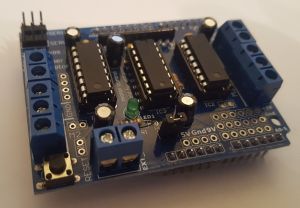
The motor board is perfectly suited for small robot projects that use 2 to 4 drive motors.
Zusätzlich bietet sie Anschlüsse für zwei Servos. Die analogen Ports sind durchgeschleift.
Facts
Here are the key data points at a glance:
- 2 Servo connections
- 2 engine mounts
- 1 Schieberegister
- Reset switch
- 1 External voltage connection
- 1 Power LED
- Jumper – zur Unterbrechung der Boardspannung
| Adafruit Motor/Stepper/Servo Shield v1 | |
|---|---|
| Manufacturer | Adafruit |
| Treiberbaustein | L293D (4 H-Brücken) |
| Engines | bis 4 DC-Motoren oder 2 Schrittmotoren; 2 Anschlüsse für 5-V-Servos |
| Strom höchstens | 0,6 A je Brücke (Spitze 1,2 A) |
| Operating voltage | 5 V |
| Input voltage | 4,5–25 V |
| Abmessungen | 69 × 53 × 14,3 mm |
| Weight | 32 g |
| Description | Logik- und Motorversorgung per Jumper trennbar |
Addendum 30.09.2023: Neuere Platinen scheinen bis 36V Ausgangsspannung zu funktionieren
Wiring

Motor bridges
Mit Hilfe der Motorbrücken können 4 Gleichstrommotoren oder 2 Schrittmotoren (mit 4 Leitungen) betrieben werden. Die L293D Motorbrücken können Motoren bis zu einem Strom von 600mA versorgen. (Kurzzeitig bis zu 1,2 A). Wird ein höherer Strom benötigt, können weitere L293D IC’s huckepack auf die vorhandenen aufgelötet und parallel betrieben werden.
Das Schieberegister ermöglicht es, mit nur 3 Pins des Arduinos die Drehrichtungen der Motoren zu bestimmen.
(evtl. mal einen Beitrag zum Schieberegister einfügen…).
Für die Ansteuerung der Motoren gibt es unter anderem eine Bibliothek von Adafruit. Diese kann über Git oder die Arduino GUI heruntergeladen werden (siehe unten).
https://github.com/adafruit/Adafruit-Motor-Shield-library/zipball/masterLink status: OK
The motor bridges occupy the following pins on the Arduino:
- Pin 11 Motor 1 – Geschwindigkeit
- Pin 3 Motor 2 – Geschwindigkeit
- Pin 5 Motor 3 – Geschwindigkeit
- Pin 6 Motor 4 – Geschwindigkeit
- Pin 4, 7, 8, 12 Directional setting for all motors via 74HC595 register.
Servo connectors
Das Board verfügt über zwei Steckplätze für Standardservos. Jeder Steckplatz hat drei Pins, jeweils einen für Strom, Masse und den Steuereingang.
The control inputs occupy the following pins on the Arduino:
- Pin 9 – Servo 1
- Pin 10 – Servo 2
External power supply
Hier können von 4.5V bis zu 25V an Schraubklemmen angelegt werden. Bitte auf die Polung achten, sonst rauchts …
Views
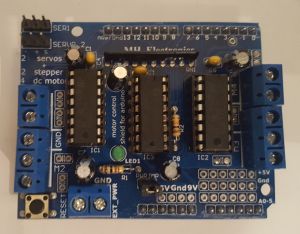
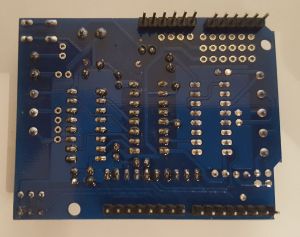
Operation
- Two-axis plotter
- 2 or 4 wheel robot
- Pan/Tilt Tripod
Programming
Libraries
I've looked at the library via GitHubLink status: OK heruntergeladen und sie manuell installiert. Über die Arduino GUI geht es etwas einfacher.
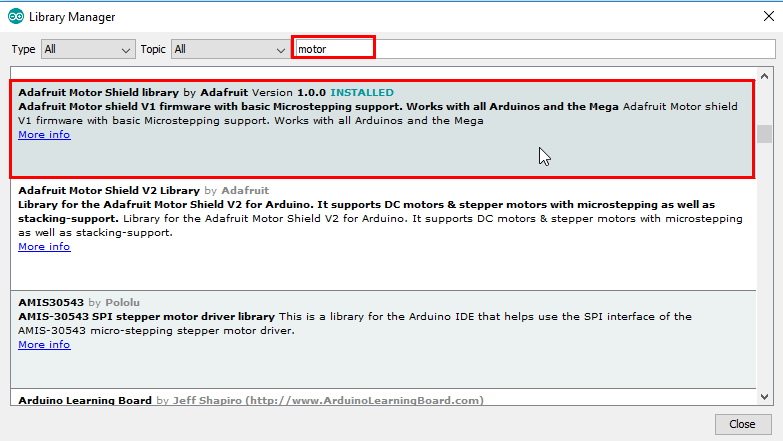
Bibliotheksmanager aufrufen:
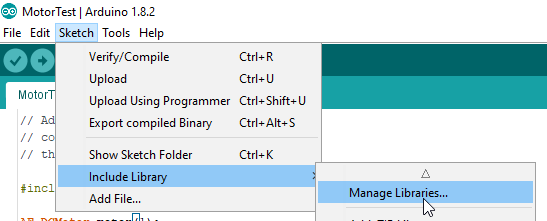
Nach „motor“ suchen und die „Adafruit Motor Shield Library“ in der letzten Version installieren. Aufgepasst, es gibt eine „Adafruit Motor Shield V2“, diese kann leider nicht für die V1 Platine verwendet werden. (Motor board V2).Link status: Broken
Code
Control servos
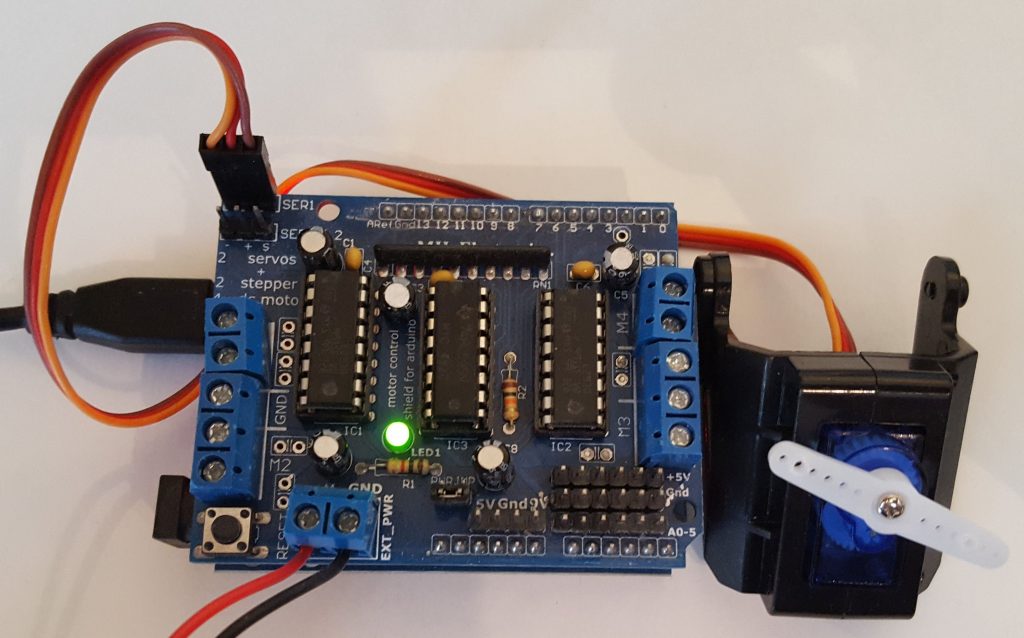
Basically, the servos are controlled quite normally via the Arduino library. The important thing for the motor board is only that the servos are connected to ports 9 and 10 here.
Meine Billigservos hakeln ein wenig an den Endpunkten, dies könnte man noch ausschließen, indem man die Konstanten min und max anpasst.
Über den Faktor kann die Schrittgröße bestimmt werden und über wait die Wartezeit zwischen den einzelnen Schritten.
Source code ServoTest.ino
#include <Servo.h> // inlcude library for servos

// init servos
#define SERVO_PIN_1 9
#define SERVO_PIN_2 10
Servo servo1;
Servo servo2;

void setup() {

  // initialize serial port
  Serial.begin(9600);

  // leonardo workaround waiting for serial port to be ok
  while(!Serial)delay(1);

  // init servos
  Serial.print("Init Servos .");
  servo1.attach(SERVO_PIN_1); Serial.print(".");
  servo2.attach(SERVO_PIN_2); Serial.println(".");
}

const int min = 0, max = 255;
int  cur = 0, factor = 1, wait = 10;

void loop() {
  // put your main code here, to run repeatedly:
  if(cur <= min){ // change to positive direction
    cur = 0; factor *= -1;
    Serial.println("Start positive direction");
  } else if( cur >= 255){ // change to negative direction
    cur = 255; factor *= -1;
    Serial.println("Start negative direction");
  }

  Serial.print(".");
  servo1.write(cur);
  servo2.write(cur);

  cur += factor;
  delay(wait);
}ServoTest.inoLink status: OK
Motoren ansteuern
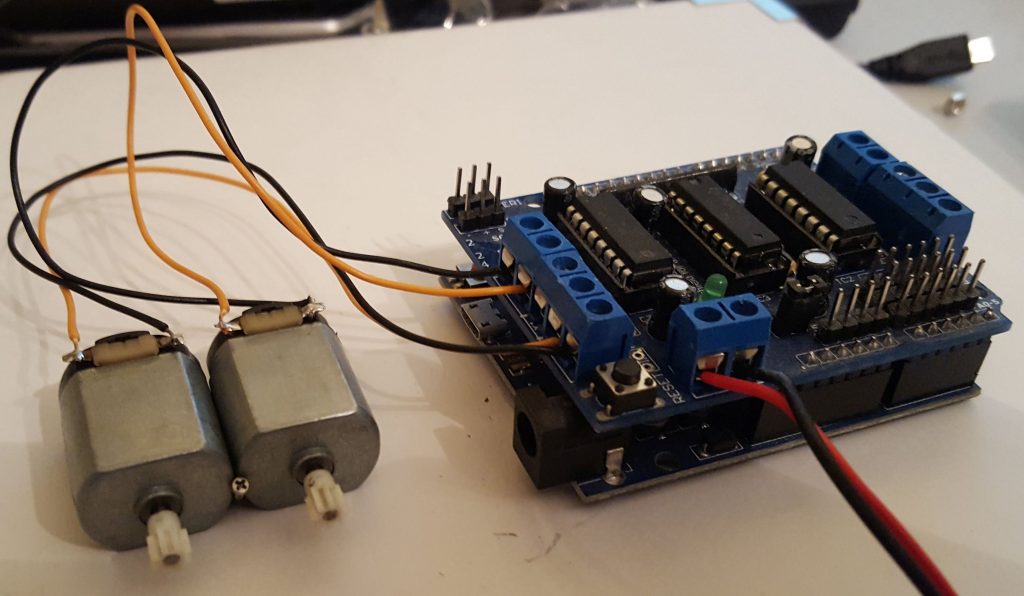
For a first test, I used the existing example program.
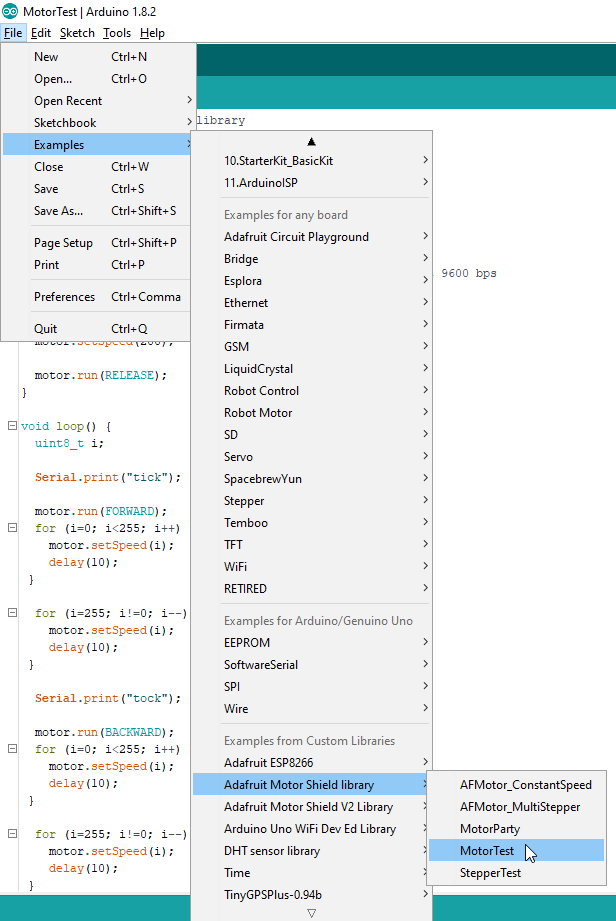
Einfach auswählen, kompilieren und schon läuft Motor 1.
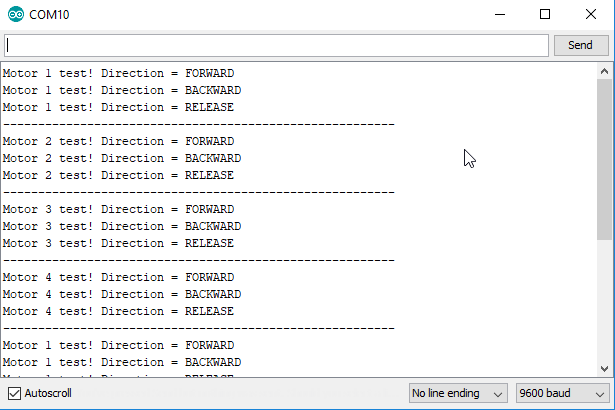
Um alle 4 Motoren zu testen, was nützlich erscheint, um die Drehrichtungen (Polung) zu überprüfen, habe ich die Datei wie folgt angepasst.
MotorTest2.inoLink status: OK
The output should then look like this.
Control stepper motor
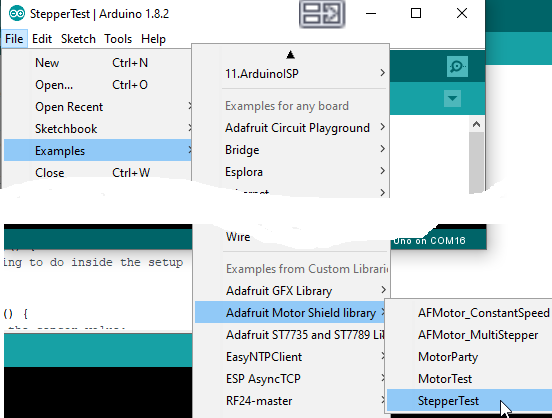
Basics of the stepper motor exist hereLink status: OK.
For the initial tests, there's a sample program.
Miscellaneous
Compatibility
The Shield can be used with the following boards.
Arduino Uno
Arduino Leonardo
Uno + WiFi
Bedingt kompatibel, es wird eine externe Spannungsquelle benötigt, um mehr als einen Servo zu betreiben.
Arduino Mega + WiFi
Conclusion
Die Platine kann 4 Motoren und zwei Servos ansteuern, was für die meisten RC oder Roboter Projekte ausreichen dürfte. Leider belegt sie hierfür bei voller Auslastung schon 10 IOs. Wer mehr IOs benötigt, könnte mit der Version 2 of the circuit boardLink status: OK be better off, but it is currently quite expensive.
Related Posts
- Retro Projekt – FDC USB Floppy Disk ControllerLink status: OK
- Preview – Arduino Motor Shield mit L298PLink status: OK
- Arduino Ethernet Board W5100Link status: OK
- Arduino VS1053 MP3 audio shield with TF cardLink status: OK
- Datenlogger Shield V 1.0Link status: OK
- NEO-6M GPS Logger Shield V1.0Link status: OK
- Arduino Sensor Board V5.0 (Sensor Shield)Link status: OK
- FunduMoto L298P High Power Motor Driver BoardLink status: OK
- Arduino Screw Terminal Board (Screw Shield 1.0)Link status: OK
- Arduino Multi-function Sensor BoardLink status: OK
Sources
https://playground.arduino.cc/Main/AdafruitMotorShieldLink status: OK
https://learn.adafruit.com/adafruit-motor-shield/library-installLink status: OK
https://learn.adafruit.com/adafruit-motor-shieldLink status: OK
https://learn.adafruit.com/adafruit-motor-shield/faqLink status: OK
| Date | Change | Author |
|---|---|---|
| 19.10.2026 | Fakten-Tabelle durch Datenblock aus dem Modell ersetzt | Suffocation |
| 10.10.2026 | Gistpen-Einbettung durch Code-Block ersetzt (Code aus der angehängten Datei ServoTest.ino) | Suffocation |
| 08.10.2026 | Überschriften-Hierarchie korrigiert (H1→H2, Unterebenen eine Stufe tiefer) | Suffocation |
| 03.10.2026 | Rechtschreibung korrigiert: Tippfehler, Kommas, Grammatik, Groß-/Kleinschreibung Log-Liste eingefügt | Suffocation |
| 21.03.2018 | Post created | Suffocation |